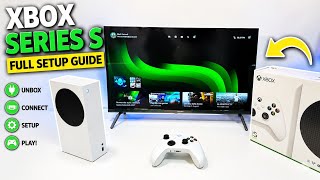
Xbox Series S Setup: A Step-by-Step Guide for New Owners
Do you own a new Xbox Series S? Whether you are upgrading from an older generation or entering the ecosystem for the first time, getting your console configured correctly ensures the best gaming experience. Even in 2025, the Xbox Series S remains a powerful, compact choice for digital gaming, offering high-speed SSD performance and Quick Resume capabilities.
Setting up your hardware is a straightforward process, but following a specific order can help you avoid common troubleshooting issues during the initial boot. This guide will walk you through everything from unboxing to your first game download.
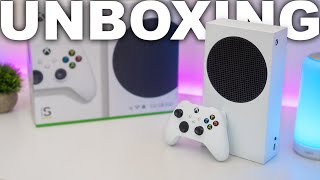
Unboxing Your Xbox Series S
Before powering on the device, ensure you have a clear, ventilated space. The Series S is a compact machine, but it still requires airflow to prevent overheating during intensive gaming sessions.
Inside the box, you will find:
- The Xbox Series S Console
- Xbox Wireless Controller
- High-speed HDMI Cable
- Power Cord
- Quick Setup Guide
Pro Tip: Avoid placing your console inside a closed cabinet. For the best longevity, keep it on an open shelf or a desk to allow the internal fan to exhaust heat efficiently.
Step-by-Step Hardware Installation
- Connect the HDMI Cable: Plug one end of the HDMI cable into the back of the console and the other into an HDMI port on your TV or monitor. For the best visual experience, use a port that supports 4K or HDR if your display allows it.
- Connect the Power: Plug the power cable into the console and then into a wall outlet. It is recommended to use a surge protector to protect your hardware from electrical spikes.
- Prepare the Controller: Insert the provided batteries into the Xbox Wireless Controller. Press and hold the Xbox button to turn it on.
Completing the Initial Software Setup
Once the hardware is connected, press the power button on the front of the console. The system will boot into the initial setup screen. Follow these steps to complete the configuration:
1. Controller Pairing
If your controller does not connect automatically, press the pairing button on the console and the pairing button on the controller simultaneously until the Xbox logo flashes. Once synced, you can navigate the menus.
2. Language and Region Selection
Select your preferred language and your current region. This ensures that your time zone is correct and that you are connected to the nearest local servers for multiplayer gaming.
3. Connecting to the Internet
You can connect via Wi-Fi or a Wired Ethernet cable. While Wi-Fi is convenient, a wired connection is highly recommended for downloading large game files and reducing latency in online matches.
4. Signing In and Account Creation
Sign in with your Microsoft account. If you do not have one, you can create it directly on the console. Your account tracks your achievements, friends list, and digital game library.
5. System Updates
The Xbox Series S will likely prompt you for a system update immediately after connecting to the internet. Do not turn off the console during this process. These updates often include stability fixes and new dashboard features that improve overall performance.
Optimizing Your Experience
Now that the basic setup is complete, take a few minutes to optimize your settings for the best results:
- Display Settings: Go to Settings > General > TV & Display Options. Ensure the resolution is set to the maximum supported by your screen and enable HDR if available.
- Power Mode: Choose between "Shutdown (Energy Saving)" or "Sleep." Sleep mode allows for faster booting and enables the console to update games in the background.
- Game Pass Subscription: Since the Series S is a digital-only console, subscribing to

![[4K] XBOX SERIES S - Unbox & How To Setup 🎮 EVERYTHING YOU NEED TO KNOW](https://i.ytimg.com/vi/QYhUc21DXhU/mqdefault.jpg)