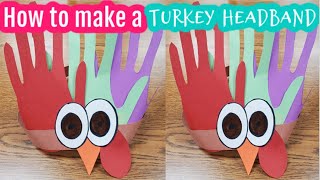
Turkey Headband Craft: A Fun DIY Project for Thanksgiving
Get ready for Thanksgiving with this fun and engaging Turkey Headband Craft! Whether you are a parent looking for a rainy-day activity or a teacher planning a festive lesson, this project is a fantastic way to bring holiday spirit into the home or classroom. Let’s make a silly handprint turkey headband for Thanksgiving! 🦃✨
This adorable craft is perfect for classrooms, preschools, and family gatherings. It combines fine motor skill development with creative expression, allowing children to imagine themselves as part of the Thanksgiving feast. By using a handprint as the base for the turkey's feathers, each headband becomes a unique piece of art reflecting the size and personality of the child who made it.
Why Choose a Handprint Turkey Headband?
DIY crafts are more than just a way to pass the time; they are essential tools for early childhood development. The Turkey Headband Craft offers several benefits:
- Sensory Exploration: Working with glue, paint, and construction paper stimulates tactile senses.
- Fine Motor Skills: Cutting, pasting, and coloring help children refine their hand-eye coordination.
- Creative Confidence: Allowing "creatively intelligent artists" to choose their own colors encourages independence and decision-making.
- Holiday Connection: It provides a tangible way for children to connect with the traditions and symbols of Thanksgiving.
Materials You Will Need
Before starting your DIY project, gather these simple supplies. Most of these items are likely already in your craft bin or available at any local stationery store:
- Construction Paper: Various colors including orange, yellow, red, and a mix of "autumn" colors (red, orange, yellow, brown) for the feathers.
- Safety Scissors: Child-safe scissors for cutting out shapes.
- Glue Stick or School Glue: To secure the feathers and the headband.
- Markers or Crayons: For drawing the turkey's face.
- Stapler or Tape: To secure the headband size to the child's head.
- Googly Eyes: For a silly, three-dimensional look (optional).
Step-by-Step Instructions
Follow these easy steps to create your animal craft. If you are working with very young children, adults may need to assist with the cutting process.
Step 1: Create the Headband Base
Cut a long strip of construction paper (about 2 to 3 inches wide). Wrap it around the child's head to ensure it fits comfortably, then staple or tape the ends together to form a circular crown. This serves as the foundation for the turkey.
Step 2: Trace and Cut the Handprint Feathers
This is the "silly" part of the craft! Have the child place their hand flat on a piece of colorful construction paper. Trace around their hand and fingers. Once traced, cut out the handprint. The fingers will act as the turkey's colorful tail feathers. For a more vibrant look, you can repeat this step with 3 or 4 different colors of paper and layer them on top of each other.
Step 3: Design the Turkey Head
Cut a small circle or oval out of orange or yellow paper to create the turkey's head. Use markers to draw a beak and eyes, or glue on googly eyes for extra personality. Don't forget to add a small red "wattle" (the fleshy part of the turkey's neck) using a small scrap of red paper.
Step 4: Assemble the Turkey
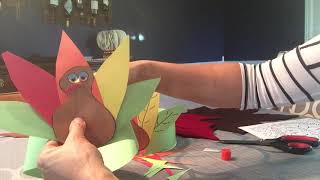
Glue the handprint feathers to the center of the headband strip. Once the feathers are secure, glue the turkey head directly on top of the feathers. This creates the illusion that the turkey is sitting right on top of the wearer's head!
Tips for Teachers and Parents
If you are