Understanding the Story Mountain Graphic Organizer
For students and aspiring writers, organizing a narrative can be a daunting task. Without a clear structure, stories often wander or fail to build necessary tension. The Story Mountain Graphic Organizer is a visual tool designed to help writers map out the trajectory of a fictional story, ensuring that the plot moves logically from the beginning to a satisfying conclusion.
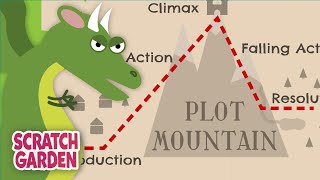
By representing the plot as a mountain, this organizer allows users to visualize the "rise" of action and the eventual "fall" toward a resolution. This method simplifies the complex elements of storytelling into a manageable, linear path.
The Five Core Elements of the Story Mountain
A standard Story Mountain is divided into five primary sections. Each section serves a specific purpose in building a cohesive narrative.
- Introduction (Exposition): This is the base of the mountain. Here, the writer introduces the main characters, the setting, and the primary mood of the story. It establishes the "normal" world before the conflict begins.
- Rising Action: As the story moves up the slope, the tension increases. This section includes the "inciting incident"—the event that kicks off the plot—and a series of complications that force the characters to react and grow.
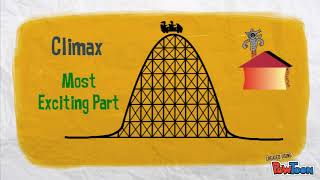
- Climax: This is the peak of the mountain. The climax is the turning point of the story and the moment of highest emotional intensity. It is where the protagonist faces the primary conflict head-on.
- Falling Action: After the peak, the story descends. This section explores the immediate consequences of the climax. The tension begins to dissipate as the characters deal with the aftermath of the main event.
- Resolution (Denouement): The base of the opposite slope. Here, loose ends are tied up, and a new sense of normalcy is established. The reader learns the final outcome for the characters.
How to Use a Story Mountain Graphic Organizer
Implementing a Story Mountain in the classroom or during a personal writing project can be done in several steps. Whether using a digital LINKtivity® or a printed worksheet, the process remains the same.
- Brainstorm the Conflict: Before filling out the organizer, decide what the main struggle is. Without a central conflict, the "mountain" will remain flat.
- Plot the Peak First: Many writers find it helpful to determine the climax first. Once you know the highest point of tension, it becomes easier to build the rising action leading up to it.
- Fill in the Slope: Map out the specific events that lead the character from the introduction to the climax. Ensure each event increases the stakes.
- Draft the Resolution: Determine how the characters have changed. A strong resolution reflects the growth the character experienced during the ascent of the mountain.
Benefits of Visual Plot Mapping
Using a graphic organizer provides several cognitive and creative advantages for learners, particularly those in middle school English modules.
Improved Pacing: One of the most common issues in storytelling is a rushed climax or a dragging introduction. A visual map allows the writer to see if they have spent too much time on the exposition and not enough on the rising action.
Enhanced Logical Flow: By seeing the story as a physical shape, writers can identify "plot holes." If there is a gap in the slope of the mountain, it usually indicates a missing piece of information or an unrealistic jump in the character's journey.
Support for Diverse Learners: Visual representations help students who struggle with traditional outlining. Tools such as plot diagram songs or short instructional videos can complement the graphic organizer, making the abstract concept of "plot" more concrete.
Tips for Educators
To help students turn their ideas into polished narratives, educators can integrate the Story Mountain into a multi-step lesson plan. Start with a short video explaining the plot of a well-known fairy tale, then have students map that story onto a mountain. Once they master analyzing existing stories, they