Story Element Chart: A Practical Guide for 7th‑Grade Language Arts
Understanding how a story works is a cornerstone of middle‑school language arts. A story element chart gives students a visual roadmap of the narrative pieces that make a tale compelling. In this article we define the essential story elements, explain how a chart can be used in a 7th‑grade classroom, and offer step‑by‑step tips for creating and applying the tool. The guidance is grounded in widely accepted literary concepts and includes free resources for videos and graphics.
What Are Story Elements?
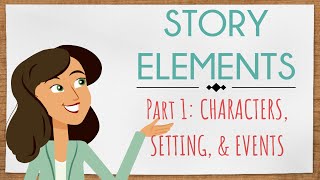
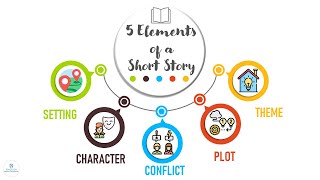
Story elements—sometimes called narrative elements—are the building blocks of any fiction or nonfiction piece. They provide the framework that helps readers follow the action, relate to characters, and grasp the author’s message. The six core elements most teachers emphasize are:
- Plot: The sequence of events that moves the story forward.
- Characters: The people (or animals, objects, forces) who act within the plot.
- Setting: The time, place, and atmosphere where the story occurs.
- Theme: The underlying idea or moral the author wants to convey.
- Conflict: The problem or tension that drives the plot.
- Resolution: The way the conflict is settled and the story ends.
These elements are not isolated; they interact continuously. For example, a character’s choices shape the conflict, which in turn influences the plot’s climax and resolution.
The Plot Element and the “Plot Mountain”
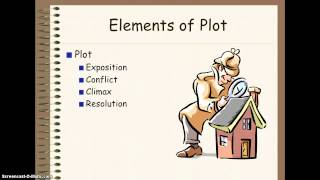
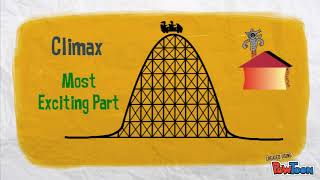
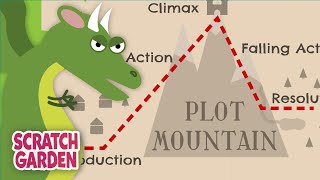
Plot is often the most visible element for students because it follows a clear arc. A plot mountain diagram—sometimes called a story arc—breaks the plot into five recognizable stages:
- Exposition: Introduces characters, setting, and basic situation.
- Rising Action: Series of events that increase tension.
- Climax: The turning point where the main conflict reaches its peak.
- Falling Action: Events that follow the climax and begin to resolve the tension.
- Resolution (Denouement): The final outcome that ties up loose ends.
A short video explaining what the plot of a story looks like can make this abstract concept concrete. One teacher‑created clip, titled “Understanding the Plot Mountain,” runs just under three minutes and uses familiar examples from popular children’s books. The video perfectly explains each stage, pausing for students to label a sample story on a printable mountain graphic.
Why Use a Story Element Chart?
In a 7th‑grade language arts lesson, a story element chart serves several instructional purposes:
- Organization: Students can see all six elements at a glance, preventing them from overlooking details such as theme or setting.
- Analysis: By filling in the chart while reading, learners practice close reading and textual evidence gathering.
- Writing Support: When drafting their own narratives, students can refer back to the chart to ensure each element is present and well‑developed.
- Collaboration: Small groups can compare charts, discuss differences, and reach consensus on ambiguous points.
Creating a Story Element Chart
Below is a simple template that works well on paper or as a digital slide. Each column represents one of the six elements; rows can be added for sub‑categories (e.g., “protagonist vs. antagonist” under Characters).
ElementDetails to Record PlotBrief summary of each mountain stage CharactersName, role, motivation, change over time SettingTime period, location, sensory details ThemeOne‑sentence statement of the central idea ConflictType (internal/external), source, stakes ResolutionHow the conflict ends, what characters learnTeachers can download a free, editable version from Freepik or create a custom version using a spreadsheet program.
Step‑by‑Step Classroom Routine
- Introduce the Elements: Use a short video (e.g., “Story Elements Overview”) to define each component.
- Model the Chart: Read a familiar short story aloud while filling out a projected chart in real time.
- Guided Practice: Hand out a printed chart and a short text. Students work in pairs to complete the chart, referring to the plot mountain as needed.
- Discussion: Groups share their charts, noting where interpretations differ. The teacher highlights evidence from the text to support each claim.
- Independent Application: For homework, students select a novel they are reading and complete a chart on their own.
- Reflection: Students answer a quick prompt—“Which element was hardest to identify and why?”—to reinforce metacognitive skills.
Tips for an Effective Story Element Chart
- Keep it concise. One to two sentences per cell keeps students focused on the most important information.
- Use visuals. Icons for characters, setting, and conflict (available on Flaticon) make the chart more engaging.
- Allow flexibility. Some stories blend elements (e.g., a setting that also creates conflict). Encourage students to note these overlaps.
- Integrate multimedia. After completing the chart, let students create a short video summary using free footage from Pexels.
Additional Video Resources
In addition to the plot mountain clip, the following videos align well with a 7th‑grade curriculum:
- “Story Elements Explained in 5 Minutes” – A concise overview that pairs nicely with the chart introduction.
- “How to Identify Theme” – Demonstrates how to pull theme statements from dialogue and narration.
- “Conflict Types and Their Effects” – Shows examples of internal vs. external conflict using popular teen novels.
References
- Merriam‑Webster Dictionary – Definitions of literary terms.
- Freepik – Free graphic templates for charts and icons.
- Pexels – High‑quality royalty‑free images for classroom displays.
- Flaticon – Icon library for visual learners.
Conclusion
A story element chart transforms abstract literary concepts into a concrete, student‑friendly tool. By systematically recording plot, characters, setting, theme, conflict, and resolution, 7th‑grade learners develop stronger analytical skills and gain confidence in their own writing. Pair the chart with a brief “plot mountain” video, encourage collaborative discussion, and provide opportunities for creative extensions such as video summaries. Keep going! Check out the next lesson and practice what you’re learning to become a more insightful reader and storyteller.