Creating a Stunning Snowflake Bulletin Board for Your Classroom
Transforming a sterile classroom wall into a Winter Wonderland is one of the most effective ways to engage students during the colder months. A Snowflake Bulletin Board not only serves as a beautiful seasonal decoration but also provides an opportunity for students to practice fine motor skills through paper cutting and geometry.
Whether you are looking for fresh Christmas decoration ideas or a general winter theme, a snowflake-themed display is timeless, gender-neutral, and visually striking. From simple "Let it Snow" banners to complex 3D installations, there are endless ways to bring the magic of winter indoors.
Choosing Your Theme and Layout
Before you begin cutting paper, it is essential to plan the layout of your board. Depending on the age of your students and the space available, you can choose from several thematic directions:
- The Frozen Forest: Use brown butcher paper to create tree trunks and hang white snowflakes from the "branches."
- Let it Snow: A minimalist approach featuring a deep blue background with a variety of white snowflakes cascading from the top.
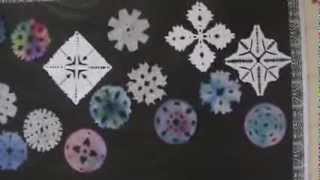
- Student Showcase: A dedicated space where each child’s unique snowflake is displayed with their name, emphasizing individuality.
- Winter Science: Combine art with education by labeling the different types of snow crystals (dendrites, needles, and plates).
Tutorial on How to Make Paper Snowflakes
The heart of any great bulletin board is the artwork. If you are wondering how to make paper snowflakes that look professional yet accessible for students, follow this simple guide. We have found that these methods produce fabulous results every time.
Step-by-Step Folding Guide
- Select Your Paper: Use white square construction paper or cardstock. For a shimmering effect, try silver foil paper or vellum.
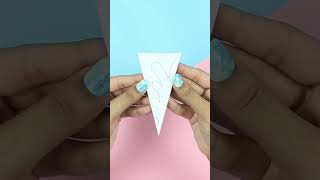
- The First Fold: Fold the square in half diagonally to create a triangle.
- The Second Fold: Fold the triangle in half again to create a smaller triangle.
- The Final Fold: Fold the triangle into thirds or halves, depending on how many "arms" you want your snowflake to have.
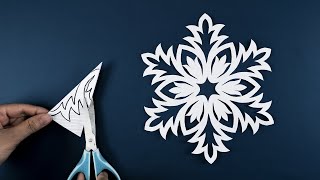
- Cutting the Design: Use scissors to cut small notches, triangles, and circles along the folded edges. Tip: Remind students not to cut all the way through the center fold, or the snowflake will fall apart.
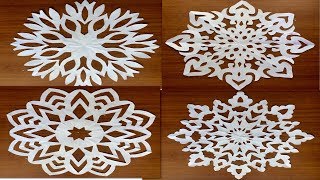
- The Reveal: Carefully unfold the paper to reveal a unique, symmetrical snowflake.
Adding Depth and Dimension to Your Display
To move beyond a flat 2D display, incorporate elements that add texture and movement. This makes the board feel like an immersive environment rather than just a wall hanging.
3D Elements: Instead of gluing snowflakes flat against the background, use foam adhesive dots or small springs of wire to make them "pop" off the board. You can also fold some snowflakes only halfway to create a 3D effect.
Mixed Materials: Combine paper with other winter-themed materials. Adding cotton balls for snow drifts at the bottom of the board or using iridescent glitter on the edges of the snowflakes can add a professional touch to your Winter Wonderland.
Managing a Large Volume of Art
In a large classroom, you may end up with 100+ winter snowflakes. Organizing this volume of art requires a strategic approach to avoid a cluttered look.
Start by grouping snowflakes by size. Place the largest flakes in the center or corners and scatter smaller ones in the gaps to create a natural, falling-snow effect. Using a dark blue or black background creates a high-contrast environment that makes the white paper stand out vividly.
Integrating Learning Objectives
A Snowflake Bulletin Board is more than just a decoration; it is a teaching tool. You can integrate several subjects into the project:
- Mathematics