How to Make Skeleton Q Tip Art: A Spooky Halloween Craft
Looking for a spooktacular way to create a fun Halloween creation using a simple household item? Look no further than Q Tip Skeletons. This creative project is an excellent activity for children and adults alike, blending basic anatomy lessons with festive holiday crafting. By turning everyday cotton swabs into bony structures, you can create a gallery of spooky figures that range from classic humans to prehistoric creatures.
Materials You Will Need
Before you begin building your skeletal masterpiece, gather the following supplies. Most of these are likely already in your junk drawer or craft bin:
- Cotton swabs (Q Tips): These serve as the "bones."
- Black construction paper or cardstock: This provides a high-contrast background that makes the white "bones" pop.
- White glue or a glue stick: To secure the swabs to the paper.
- Scissors: For cutting the swabs to different lengths.
- White paint or a white marker: Useful for drawing smaller joints or a skull.
- Optional: Googly eyes or silver glitter for extra flair.
Step-by-Step Guide to Creating Q Tip Skeletons
In this fun Halloween craft tutorial, we'll show you how to create a spooky skeleton using a simple layering technique. Follow these steps to ensure your figure looks anatomically plausible while remaining festive.
Step 1: Plan the Layout
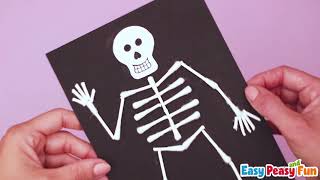
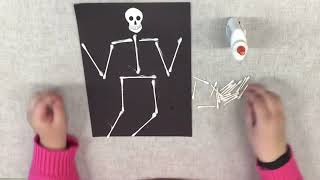
Before applying glue, lay out your cotton swabs on the black paper. Start with the spine as your central axis. Use one full-length Q Tip for the torso and a shorter piece for the neck. This helps you visualize the scale of the skeleton before it becomes permanent.
Step 2: Construct the Torso and Ribs
Apply a line of glue along the spine. To create the ribcage, cut Q Tips in half. Glue these shorter pieces horizontally across the spine in a symmetrical pattern. To give the ribs a more natural curve, you can gently bend the swabs or cut them at slight angles.
Step 3: Adding the Limbs
Now it is time to add the arms and legs. For the upper arms and thighs, use full-length Q Tips. For the forearms, shins, and fingers, cut the swabs into smaller segments. Pro Tip: Leave a small gap between the swabs to represent joints like elbows and knees; this makes the skeleton look more realistic and flexible.
Step 4: Creating the Skull
Since Q Tips are linear, they don't work well for the head. Instead, use a white marker to draw a skull, or cut a small circle out of white paper and glue it to the top of the neck. If you want a more 3D effect, you can glue a cotton ball to the top of the neck and paint it white.
Expanding Your Creativity: Beyond the Human Skeleton
Once you have mastered the basic human form, why stop there? You can use the same principles to create a variety of other skeletal creatures. Many crafters enjoy experimenting with different animals to see how their bone structures differ.
Making a T-Rex Skeleton
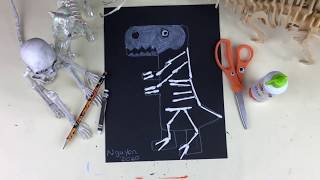
If you want to try something more prehistoric, try building a T-Rex. To do this, focus on a much larger ribcage and a long, heavy tail made of segmented Q Tips. The most distinct part of a T-Rex is the arms; use very short pieces of cotton swabs to create those famously tiny limbs. This is a great way to teach kids about paleontology while they craft.
Why Q Tip Art is Great for Kids
Beyond the spooky aesthetic, Q Tip Skeletons offer several developmental benefits:
- Fine Motor Skills: Cutting small pieces of plastic and cotton requires precision and coordination.
- Basic Anatomy: It encourages children to think about where bones are located in the body and how they connect.