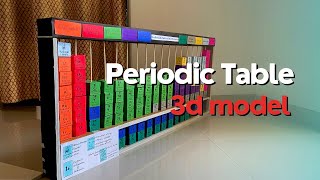
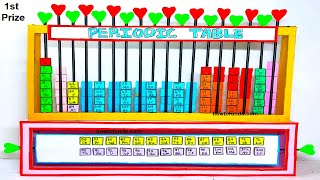
Project Of Periodic Table: Building a 3D Rotatable Model for Science Class
The periodic table is more than a chart on a classroom wall; it is a visual map of the building blocks of matter. Turning that flat chart into a three‑dimensional, rotatable model transforms abstract concepts into a hands‑on learning experience. This article walks you through a complete how‑to‑make guide for a Project Of Periodic Table that is perfect for a science fair, a classroom activity, or a DIY home experiment.
Why a 3D Periodic Table?
- Spatial understanding: Students can see how groups and periods stack in three dimensions, reinforcing trends such as atomic radius and electronegativity.
- Interactive learning: A rotatable model invites curiosity—students can spin the table, lift individual blocks, and explore relationships on their own.
- Cross‑curricular skills: The project blends chemistry, geometry, and basic engineering, helping learners develop problem‑solving and teamwork abilities.
Materials You’ll Need
- Sturdy base: cardboard, foam board, or a thin plywood sheet (minimum 30 × 40 cm).
- Element blocks: 118 small cubes or rectangular prisms (1 × 1 × 1 in. works well). You can cut them from foam board, use wooden blocks, or 3D‑print them.
- Paints or permanent markers in a consistent color scheme (e.g., alkali metals in red, noble gases in blue).
- Adhesive: hot‑glue gun, strong craft glue, or double‑sided tape.
- Rotating mechanism: a lazy‑Susan bearing (available at hardware stores) or a simple turntable from a record player.
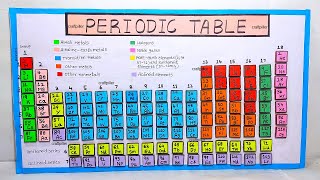
- Reference sheet: a printed periodic table for accurate placement of symbols, atomic numbers, and atomic masses.
- Optional accessories: small magnets for removable blocks, clear acrylic rods for support, and a label holder for a legend.
Step‑by‑Step Construction
1. Design the LayoutBefore cutting anything, sketch the layout on graph paper. The standard periodic table has 7 periods (rows) and 18 groups (columns). Leave space for the lanthanide and actinide series, which are usually placed as two separate rows beneath the main grid.
2. Prepare the Element BlocksCut 118 blocks to the same dimensions. If you are using a 3D printer, download a free periodic table block STL file and print in PLA or ABS. Once cut or printed, label each block with:
- Element symbol (e.g., Fe)
- Atomic number (e.g., 26)
- Atomic mass (optional)
Use a fine‑tip marker or paint for clear, legible text. Color‑code the blocks by element family to make trends instantly recognizable.
3. Build the Base GridAttach a thin strip of foam board or a wooden frame to the base, forming a grid of 18 × 7 squares. Secure the grid with glue or small nails. This framework will hold the element blocks in place while still allowing rotation.
4. Install the Rotating MechanismCenter a lazy‑Susan bearing on the underside of the base. Apply a strong adhesive to both the bearing and the base, ensuring the bearing can turn freely without wobbling. Test the rotation before adding blocks.
5. Place the Element BlocksStarting with hydrogen in the top‑left corner, glue each block into its corresponding square. For the lanthanides and actinides, create two short rows beneath the main table and label them clearly. Leave a small gap between blocks if you plan to make them removable with magnets.
6. Add Finishing Touches- Attach a legend on the side of the base explaining the color scheme.
- Seal the paint with a clear acrylic spray to protect the markings.
- Optional: affix small LED lights to highlight specific groups (e.g., transition metals).
Enhancing the Project
Once the basic model is complete, consider these extensions to deepen learning:
- Interactive quizzes: Write questions on index cards and ask students to locate the answer element on the rotating table.
- Digital companion: Pair the physical model with a QR code that links to an online periodic table for quick reference.
- Scientific data display: Add tiny pockets on each block to hold a slip of paper with melting point, density, or common uses.
- Environmental twist: Use recycled materials (e.g., bottle caps for blocks) to teach sustainability alongside chemistry.
Safety and Classroom Tips
When constructing the model, keep these safety points in mind:
- Use a cutting mat and safety scissors when cutting foam board.
- Hot‑glue guns can cause burns; supervise younger students.
- If 3D‑printing, work in a well‑ventilated area and wear a mask when sanding printed parts.
In the classroom, assign each student or small group a set of elements to decorate. This collaborative approach speeds up construction and reinforces ownership of the learning material.
Conclusion
A Project Of Periodic Table that results in a 3D rotatable model offers a tangible way to explore chemical relationships. By following the step‑by‑step guide above, you can create a durable, visually striking educational tool that encourages curiosity, supports curriculum standards, and provides endless opportunities for interactive learning. Whether you choose a simple cardboard version or a polished 3D‑printed masterpiece, the act of building the table deepens understanding in a way that a flat poster simply cannot match.
Further Resources
- Online tutorials on 3D‑printing periodic table blocks (search “periodic table STL download”).
- DIY chemistry blogs such as howtofunda and craftpiller for creative block designs.
- National Science Teachers Association (NSTA) lesson plans that incorporate hands‑on periodic table activities.