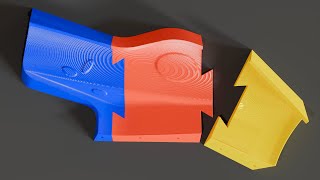
What Is a Printable Part Chart?
A Printable Part Chart is a visual reference that lists every component of a design, along with its dimensions, material specifications, and printable settings. Engineers, makers, and hobbyists use it to keep track of parts that will be fabricated on a 3‑D printer, CNC mill, or laser cutter. By consolidating this information on a single sheet, the chart eliminates guesswork and reduces the risk of missing a critical detail before production.
Why You Need a Printable Part Chart
Visibility is the key to a smooth workflow. As one expert puts it, “You don’t have a discipline problem — you have a visibility problem.” A well‑organized chart makes the entire bill of materials (BOM) instantly visible, which helps teams stay on schedule and avoid costly re‑prints.
- Improved accuracy: All tolerances and material choices are listed in one place.
- Faster communication: Designers can share the chart with manufacturers, reviewers, or clients without sending multiple files.
- Streamlined printing: Print settings (layer height, infill, support type) are pre‑filled, so operators can start the job with a single click.
Key Elements of an Effective Printable Part Chart
To get the most out of your chart, include the following sections:
- Part Number & Name – A unique identifier that matches the CAD model.
- Dimensions – Critical measurements such as length, width, height, and wall thickness.
- Material & Color – PLA, PETG, ABS, resin, or metal, plus any color codes.
- Print Settings – Layer height, infill percentage, print speed, and support requirements.
- Post‑Processing Notes – Sanding, annealing, or painting instructions.
- Quantity – Number of copies needed for the build.
How to Create a Printable Part Chart in Onshape
Onshape’s cloud‑based platform makes it easy to generate a part list directly from your assembly. Follow these steps to create a chart you can print or share as a PDF:
- Open your assembly and click Bill of Materials (BOM) in the toolbar.
- Select the columns you need: Part Number, Name, Quantity, and Custom Property for material.
- Use the Custom Property field to store print settings (layer height, infill, etc.).
- Export the BOM as a CSV file, then open it in a spreadsheet program.
- Format the spreadsheet with headings