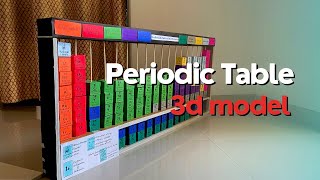
Periodic Table Element Project: A Complete Guide
The Periodic Table Element Project is a hands‑on activity that lets students explore the building blocks of matter while developing research, collaboration, and presentation skills. Whether you’re a science teacher, a homeschool parent, or a curious learner, this guide walks you through every step of creating a fully functional, classroom‑ready model of the periodic table.
Why Build a Periodic Table Element Project?
Incorporating a Periodic Table into the curriculum moves learning from abstract concepts to tangible experience. Students:
- Visualize relationships between elements.
- Connect chemical properties to real‑world applications.
- Practice data collection and scientific communication.
- Show creativity through design and storytelling.
By the end of the project, participants will have a deeper appreciation for the COMPLETE periodic table and the science that underpins everyday life.
Planning Your Project
- Define Objectives – Decide whether the focus is on element properties, historical context, or modern uses.
- Choose a Format – Options include a poster, digital interactive, 3‑D model, or a multimedia presentation.
- Allocate Time – A typical project lasts 2–4 weeks, allowing for research, creation, and revision.
Materials Needed
Below is a flexible list that can be adapted to different budgets and skill levels.
- Cardboard, foam board, or sturdy paper for the base.
- Markers, colored pencils, or paint.
- Printed or printed‑on‑card stock for element cards.
- Glue, tape, or a hot glue gun.
- Optional: 3‑D printing or clay for a physical model.
- Digital tools: Google Slides, Canva, or Scratch for interactive versions.
Step‑by‑Step Guide to Making Your Periodic Table
- Gather Information
Use reputable sources such as the International Union of Pure and Applied Chemistry (IUPAC) database or educational videos that provide a basic introduction into the periodic table. Compile data for each element: name, symbol, atomic number, atomic mass, group, period, and key properties.
- Create a Layout
Decide whether the table will be printed or built on a board. For a printed version, use a grid template. For a board, draw a large grid that can hold individual element cards.
- Design Element Cards
Each card should include:
- Element name and symbol.
- Atomic number and mass.
- Group and period numbers.
- A short description of the element’s significance.
- Color‑coded by category (metals, non‑metals, noble gases, etc.).
- Assemble the Table