Mastering Depth with One Point Perspective Worksheets
Learning how to create the illusion of depth on a flat surface is one of the most rewarding milestones for any aspiring artist. For beginners, the most effective way to start is by mastering one point perspective. This technique allows you to turn basic shapes into three-dimensional forms, creating a realistic sense of space and distance.
Whether you are sketching a city street or designing an interior, using structured one point perspective worksheets can accelerate your progress by providing the necessary constraints to practice accuracy before moving on to freehand drawing.
What is One Point Perspective?
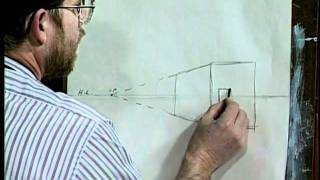
One point perspective is a drawing method where all lines that are parallel to the viewer's line of sight converge at a single point on the horizon. This point is known as the vanishing point. In this system, there are three primary types of lines:
- Horizontal Lines: Lines that run left to right, parallel to the horizon.
- Vertical Lines: Lines that run up and down, perpendicular to the horizon.
- Orthogonal Lines: Diagonal lines that connect the corners of an object to the vanishing point.
By combining these three line types, you can transform a simple square into a 3D box, which serves as the foundation for almost every complex object in a scene.
How to Use One Point Perspective Worksheets
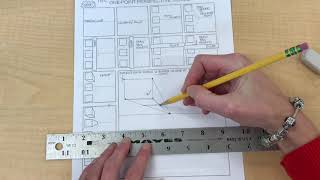
Worksheets are essential because they remove the guesswork from the initial setup. A well-designed worksheet typically provides a pre-drawn horizon line and a centered vanishing point, allowing the student to focus entirely on the relationship between the object and the convergence point.
Step-by-Step Guide to Drawing a 3D Box
- Draw the Front Face: Start by drawing a basic 2D shape, such as a square or rectangle, anywhere on the worksheet.
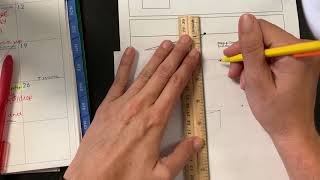
- Connect to the Vanishing Point: Using a ruler, draw light orthogonal lines from each corner of your square to the vanishing point.
- Define the Depth: Draw a horizontal line and a vertical line to "cut off" the box at your desired depth. These lines must be perfectly parallel to the edges of the front face.
- Clean Up: Erase the remaining orthogonal lines that extend past the back of the box to finalize the 3D form.
Common Mistakes to Avoid
The biggest mistake with doing one point perspective is failing to keep horizontal and vertical lines truly straight. When artists begin to "tilt" their vertical lines or "slant" their horizontal lines, the illusion of depth breaks, and the object appears warped or distorted.
Another common error is drawing orthogonal lines that do not actually hit the vanishing point. Even a slight deviation can make a building look like it is leaning or collapsing. This is why using a straight edge and a dedicated worksheet is highly recommended for beginners.
Expanding Your Skills: From Boxes to Rooms
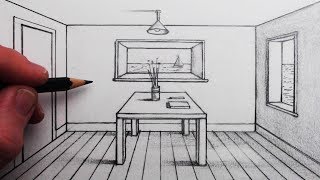
Once you are comfortable drawing individual boxes, you can apply the same logic to larger environments. For example, when learning how to draw a room, the back wall of the room acts as your primary plane, and the corners of the room serve as the orthogonal lines leading to the vanishing point.
By placing "boxes" (which represent furniture like beds, tables, or bookshelves) within this perspective grid, you can create a fully realized interior space. The key is to ensure that every piece of furniture follows the same vanishing point as the walls of the room.
Resources for Further Learning
If you are looking for more guided instruction, there are several ways to supplement your worksheet practice:
- Video Tutorials: Visual learners can benefit from watching demonstrations on how to construct boxes and rooms. For a detailed walkthrough, you can find a full video here.
- Structured Courses: For those