Make Learning the Alphabet Fun with an Uppercase Letter C Craft
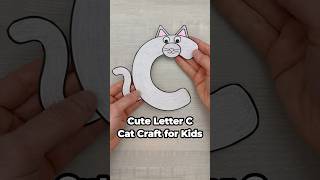
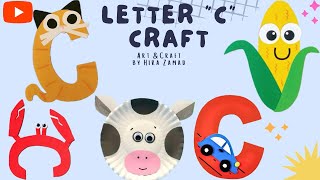
Teaching the alphabet becomes a joyful adventure when children can touch, shape, and color the letters they are learning. One of the most engaging projects is the Letter C Craft, where the uppercase C transforms into a charming caterpillar. This art‑and‑craft activity blends creativity with early literacy, helping preschoolers and kindergarteners recognize the letter while developing fine‑motor skills.
What Is a Letter C Craft?
A Letter C Craft is a hands‑on project that uses simple supplies to turn the shape of the uppercase C into a three‑dimensional caterpillar. The craft serves three educational purposes:
- Letter recognition: The curved body of the caterpillar mirrors the form of the letter C.
- Fine‑motor development: Cutting, gluing, and painting strengthen hand‑eye coordination.
- Creative expression: Children choose colors, add details, and even invent a story for their caterpillar.
Materials You’ll Need
- Large sheet of construction paper or cardboard (background)
- Green construction paper (caterpillar body)
- White or yellow paper (head and legs)
- Scissors
- Glue stick or white glue
- Tempera paint or washable markers
- Paintbrushes
- Pipe cleaners (optional for 3‑D legs)
- Glitter, stickers, or other decorative accents (optional)
Step‑by‑Step Letter Cutting Tutorial (Letter C)
1. Prepare the Background
Give each child a large piece of paper or cardboard to serve as the canvas. If you prefer a guided approach, print a faint uppercase C outline on the background and let the children trace it.
2. Cut the Caterpillar’s Body
From the green construction paper, cut a long, curved strip that follows the shape of an uppercase C. This will become the caterpillar’s body. For younger children, pre‑cut the strip and let them practice gluing.
3. Create the Head and Legs
Cut small circles from white or yellow paper for the head and for each of the six legs. If you have pipe cleaners, bend them into tiny “L” shapes for a more three‑dimensional effect.
4. Assemble the Caterpillar
Apply glue to the curved green strip and press it onto the background, ensuring the curve points upward like the letter C. Attach the head at the top of the curve and glue the legs evenly along the underside of the body.
5. Add Details and Decorations
Use paint, markers, or crayons to draw eyes, a smiling mouth, and tiny spots on the caterpillar’s back. Encourage children to add leaves, flowers, or a garden scene around the caterpillar to create a complete picture.
6. Final Touches
Let the craft dry completely. Offer glitter, stickers, or sequins for a sparkle finish, and invite each child to give their caterpillar a name.
Educational Benefits of the Letter C Craft
Beyond the immediate fun, this activity supports several key developmental areas:
- Letter recognition: Repeated exposure to the shape of C reinforces visual memory.
- Phonemic awareness: While crafting, say the /k/ sound and discuss words that begin with C (cat, car, cake).
- Fine‑motor coordination: Cutting, gluing, and painting refine hand muscles needed for writing.
- Language development: Encourage children to describe their caterpillar, fostering vocabulary and sentence structure.
- Problem‑solving: Deciding where to place legs or how to balance the body nurtures logical thinking.
Variations to Keep the Project Fresh
If you plan to revisit the Letter C Craft over several weeks, try these variations:
- Different textures: Use felt, foam sheets, or fabric scraps for the body.
- 3‑D version: Build a sturdy caterpillar with papier‑mâché or modeling clay that can stand on its own.
- Story time: Have each child write a short story about where their caterpillar lives and what it eats.
- Alphabet series: Create a whole set of “letter animals,” turning each uppercase letter into a creature (e.g., “B” as a butterfly, “D” as a dolphin).
Safety Tips for a Smooth Craft Session
- Supervise the use of scissors, especially with children under five.
- Choose non‑toxic, washable paints and markers.
- Provide a clean, flat surface and protect clothing with aprons or old shirts.
- Keep glue away from eyes and mouth; use a glue stick for younger hands.
Printable Resources
To simplify preparation, you can download a free Letter C template that includes:
- A faint C outline for tracing.
- Cut‑out shapes for the head and legs.
- Suggested color palettes.
Print the template on cardstock, and you’ll have a ready‑made guide for the #lettercutting activity.
Conclusion
The Letter C Craft turns a simple alphabet lesson into a memorable art project. By making a lovely caterpillar with the shape of C, children not only learn to recognize the letter but also practice essential motor and language skills. Whether you follow the basic steps or explore the suggested variations, this craft offers endless opportunities for creativity and learning. Gather your supplies, set up a safe workspace, and watch the alphabet come alive—one charming caterpillar at a time.