How to Whistle: A Complete Beginner’s Guide
Whistling is a handy skill that can add a musical touch to everyday moments, help you signal friends, or simply serve as a fun party trick. While many people assume it comes naturally, most of us need a clear, step‑by‑step method to get the sound right. This guide walks you through the basics, offers practical tips, and even introduces a few advanced techniques—so you can go from “I can’t make a sound” to “I’m whistling a tune” in a matter of weeks.
Why Learn to Whistle?
Beyond the obvious fun factor, learning to whistle can improve breath control, strengthen facial muscles, and boost confidence when you’re able to produce a clear tone on demand. It’s also a skill you can share with kids—many parents enjoy teaching the “art of finger whistling” as a playful activity that encourages focus and coordination.
Getting Started: Preparing Your Mouth
Before you try to produce a sound, set up the right mouth shape. Follow these three simple steps:
- Pucker your lips. Imagine you’re about to blow a gentle kiss. Keep the corners of your mouth relaxed; tension will block the airflow.
- Position your tongue. Lightly touch the tip of your tongue to the ridge just behind your upper front teeth. The sides of the tongue should rest gently against the upper molars, creating a narrow channel for the air.
- Control your breath. Take a deep, steady breath from your diaphragm. A smooth, continuous stream of air is essential for a clean tone.
These fundamentals are the same whether you’re using just your lips or adding fingers later on.
The Basic Whistling Technique
Once your mouth is ready, try the following:
- Blow gently through the small opening you’ve created. The air should rush over the edge of your tongue and out of the puckered lips.
- Listen for a faint, high‑pitched “twee.” If you only hear air, adjust the size of the lip opening—make it slightly smaller or larger until a tone emerges.
- Practice the pitch by varying the force of your breath. A softer blow yields a higher note; a stronger blow lowers the pitch.
It’s normal for the first attempts to sound airy or inconsistent. Consistent practice is the key to refining the tone.
Common Mistakes and How to Fix Them
Even seasoned whistlers run into obstacles. Here are the most frequent issues and quick fixes:
- Too much tension. If your lips feel tight, relax them and take a slower breath.
- Incorrect tongue placement. Move the tip of your tongue a millimeter forward or backward; the sweet spot is often just behind the upper teeth.
- Air leaks. Ensure the sides of your tongue seal against the molars. A small leak can mute the sound completely.
Practice Routine: Turning Effort into Skill
To move from occasional attempts to reliable whistling, set a short, daily routine:
- Warm‑up (1 minute). Hum a simple scale to engage your breath control.
- Basic whistle drills (3‑5 minutes). Focus on producing a steady tone, then try to raise and lower the pitch by adjusting breath pressure.
- Pitch matching (2 minutes). Play a note on a piano or a phone app and try to match it with your whistle.
- Cool‑down (1 minute). Finish with a gentle sigh to relax the facial muscles.
Even five minutes a day can produce noticeable progress within a week.
Introducing the Art of Finger Whistling
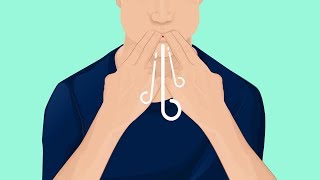
Finger whistling creates a louder, sharper sound that can be heard across a room—perfect for calling attention or impressing friends. Here’s a concise method:
- Choose a finger pair (commonly the thumb and middle finger of one hand).
- Wash your hands, then place the chosen fingers together and press them against the inside of your lips, forming a tight seal.
- Pull your tongue back slightly, creating a larger cavity for the air to vibrate.
- Take a deep breath and blow forcefully through the small opening created by your fingers.
It may take several attempts to find the right pressure and tongue position, but once you get the hang of it, the sound is dramatically louder than a standard whistle.
Multi‑Tone and Harmonic Whistling
Advanced whistlers sometimes produce two tones simultaneously, a technique used in some folk traditions. The basic idea is to hum a low note while whistling a higher one. Start by:
- Whistling a steady pitch.
- While maintaining the whistle, gently hum a different note using your throat.
- Adjust the hum’s pitch until you hear a clear harmonic blend.
This skill requires strong breath support and coordination, so treat it as a long‑term goal.
Fun Applications and Why It Matters
Beyond personal satisfaction, whistling can be a useful tool in various settings:
- Outdoor activities. Signal teammates during a hike or a game of hide‑and‑seek.
- Music practice. Use a whistle to keep tempo or as a simple melodic instrument.
- Kid’s activities. Teaching children to whistle encourages fine motor development and listening skills.
If you’re looking for more creative projects, check out my website where I post the hottest tech deals and occasional tutorials: https://www.inotechdeals.com. While you’re there, you’ll also find links to a full YouTube playlist of kid‑friendly activities and a community goal to reach 100,000 subscribers—your support helps keep the content coming!
Quick Reference Checklist
- Relaxed, puckered lips.
- Tongue tip just behind upper front teeth.
- Steady, diaphragmatic breath.
- Daily 5‑minute practice routine.
- Experiment with finger whistling for louder sound.
- Try humming while whistling to explore harmonics.
Final Thoughts
Learning how to whistle is a blend of proper mouth positioning, breath control, and consistent practice. Start with the basic technique, refine it through daily drills, and gradually explore advanced methods like finger whistling and multi‑tone humming. Remember that progress may feel slow at first, but each small improvement builds muscle memory and confidence.
So take a deep breath, shape those lips, and give it a try. With patience and the right approach, you’ll soon be able to produce clear, confident whistles that can brighten a quiet room or add a playful note to any gathering.