How to Vectorize an Image in Illustrator: A Complete Step‑by‑Step Tutorial
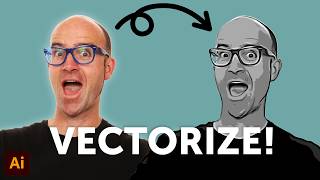
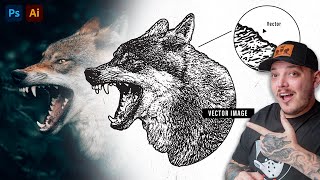
If you need to create a scalable graphic that looks sharp at any size, vectorizing a raster image in Adobe Illustrator is the solution. This quick and easy way to convert pixels into editable paths lets you resize logos, icons, and illustrations without losing quality. In this quick tutorial, you’ll learn the ins and outs of the process, from preparing your file to exporting a clean vector artwork ready for print or web.
What Does “Vectorize” Mean?
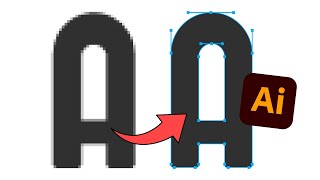
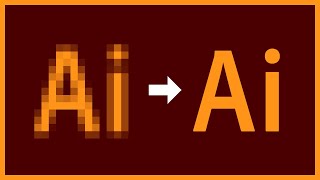
Raster images are made of tiny squares called pixels. When you enlarge them, the pixels become visible and the picture looks blurry. Vector graphics, on the other hand, are built from mathematical paths (lines, curves, and shapes). Because they’re defined by equations rather than fixed dots, vectors can be scaled infinitely while staying crisp.
When Should You Vectorize?
- Logo design – you’ll need the logo on business cards, billboards, and merchandise.
- Icon sets – icons must work at 16 px and 256 px alike.
- Illustrations for apparel or decals – large‑format printing demands clean vectors.
- Any artwork that will be edited later – paths are far easier to modify than pixels.
Preparing Your Image for Tracing
Before you start, give the image a quick clean‑up. A high‑contrast, well‑cropped source yields the best results.
- Choose a high‑resolution file. The clearer the details, the more accurate the trace.
- Crop out unnecessary background. Use Photoshop or Illustrator’s Crop Image tool to isolate the subject.
- Adjust contrast if needed. A black‑and‑white image often traces more cleanly than a low‑contrast photo.
Step 1: Open the Image in Illustrator
Launch Illustrator and go to File > Open. Locate your raster file (JPG, PNG, TIFF, etc.) and click Open. The image will appear on a new artboard.
Step 2: Access the Image Trace Panel
With the image selected, click the Image Trace button on the Control bar or choose Window > Image Trace to open the full panel. This is where the magic happens.
Step 3: Choose a Preset
Illustrator offers several presets that give you a good starting point:
- High Fidelity Photo – retains many colors, ideal for detailed artwork.
- Low Fidelity Photo – reduces colors for a stylized look.
- Black and White Logo – perfect for simple line art.
- 3‑Color, 6‑Color, 16‑Color – useful when you need a limited palette.
Pick the preset that matches your project, then click Preview to see a live conversion.
Step 4: Fine‑Tune the Trace Settings
For a polished result, adjust the following options in the Image Trace panel:
- Mode: Choose Color, Grayscale, or Black and White depending on the final use.
- Palette: Automatic works for most cases, but you can select Limited and set a custom swatch for brand consistency.
- Colors: Set the exact number of colors you want. Fewer colors simplify the vector and reduce file size.
- Paths: Increase the Threshold to capture more detail, or lower it for a smoother look.
- Corners: Adjust the Corner Angle to keep sharp edges or soften them.
- Noises: Raise the Noise value to ignore tiny specks that would otherwise become separate paths.
Toggle the Preview checkbox after each change to see how the adjustments affect the artwork.
Step 5: Expand the Traced Image
When you’re satisfied with the preview, click Object > Image Trace > Expand. This converts the live trace into editable vector paths. You’ll now see the Layers panel populated with groups of paths that you can select, move, or delete.
Step 6: Clean Up the Vector
Even the best trace can leave stray points or unnecessary groups. Use these tools to tidy up:
- Direct Selection Tool (A) – click individual anchor points to adjust curves.
- Pen Tool (P) – add or delete points for precise control.
- Pathfinder – merge overlapping shapes or subtract unwanted areas.
- Shape Builder Tool (Shift+M) – quickly combine adjacent shapes into a single path.
Take a moment to delete any hidden background objects and simplify complex paths with Object > Path > Simplify if needed.
Step 7: Save and Export
Now that your vector is clean, you can save it in the format that best fits your workflow:
- AI – native Illustrator file for future editing.
- SVG – web‑friendly, scalable vector format.
- PDF – ideal for print and sharing with clients.
- EPS – widely accepted by other design programs.
Go to File > Export > Export As…, choose the desired format, and click Export. For SVG, you can also adjust the CSS Properties and Decimal Places to keep the file lightweight.
Tips for a Professional Result
- Start with a clean source. A high‑resolution, high‑contrast image reduces the need for heavy cleanup.
- Use the right preset. A “Black and White Logo” preset works best for line art, while “High Fidelity Photo” is better for detailed illustrations.
- Limit colors early. Fewer colors make the vector easier to edit and keep file sizes low.
- Zoom in while cleaning. Small stray points are easier to spot at 200 % zoom.
- Save iterations. Keep a copy of the original trace before you start editing, so you can revert if needed.
Common Pitfalls and How to Avoid Them
Too many anchor points – Over‑tracing creates a heavy file. Use Object > Path > Simplify to reduce point count.
Poor contrast – Low‑contrast images produce fuzzy vectors. Increase contrast in Photoshop or use the Adjust Color Balance tool before tracing.
Unwanted background – If the background is included in the trace, isolate the subject first or use the Ignore White option in the Image Trace panel.
Next Steps: Expand Your Skills
Now that you’ve mastered the basics, consider exploring more advanced techniques such as:
- Creating custom brushes from traced shapes.
- Applying gradient meshes to add depth to vector artwork.
- Using the Live Paint feature to recolor complex illustrations quickly.
A quick and easy way to keep learning is to Watch + join BYOL for access to all of our in‑depth video lessons and community feedback. Download the latest version of Illustrator, follow the weekly prompts, and experiment with AI‑driven design courses to stay ahead of the curve.
Conclusion
Vectorizing an image in Illustrator transforms a pixel‑based picture into a flexible, editable artwork that can be scaled to any size. By following the steps outlined above—preparing the source, using Image Trace, fine‑tuning settings, expanding, cleaning up, and exporting—you’ll be able to produce professional‑grade vectors for logos, merchandise, web graphics, and more. Need to create a scalable image for a brand or a product line? This tutorial gives you the foundation, and the resources linked below will help you take your skills to the next level.
Weekly Prompts, Ai Courses & Winning Niches: https://bit.ly/Merch-Mastermind ⭐Adobe