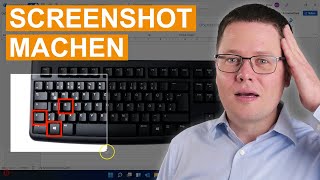
How to Screenshot in Windows 11 Laptop: Step‑by‑Step Guide
Whether you need to capture your whole screen – or just a portion of it – Windows 11 provides a number of different methods to get the shot you want. In this guide we’ll walk through the most reliable ways to take a screenshot on a Windows 11 laptop, explain when each method shines, and share a few tips to make your workflow faster.
Why Knowing Multiple Screenshot Techniques Matters
Every day you’ll encounter a different scenario: a quick bug report, a polished tutorial image, or a snippet of a confidential chat that you need to share securely. Relying on a single shortcut can slow you down when the situation changes. By mastering at least three ways to take a screenshot, you’ll be prepared for any task without hunting for the right tool.
Method 1 – Classic Print Screen (PrtScn)
The oldest and most universal method works on virtually any Windows device.
- Locate the Print Screen key on your keyboard (often labeled PrtScn, PrtSc, or Print Scr).
- Press PrtScn. The entire screen is copied to the clipboard.
- Open an image editor such as Microsoft Paint or Paint 3D.
- Press Ctrl + V to paste, then save the file in your preferred format (PNG is recommended for lossless quality).
This method is perfect when you simply need a quick full‑screen capture and plan to edit the image afterward.
Method 2 – Windows Key + Print Screen
If you want the screenshot saved automatically, combine the Windows key with Print Screen.
- Press Windows + Print Screen. Your screen will dim briefly, confirming the capture.
- The image is stored in Pictures → Screenshots as a PNG file named “Screenshot (1).png”, “Screenshot (2).png”, etc.
- You can open the folder directly from the notification that appears, or navigate there later.
This shortcut eliminates the extra paste step and is ideal for documenting a series of screens, such as during software testing.
Method 3 – Snipping Tool (Built‑in)
Windows 11’s Snipping Tool merges the classic Snip & Sketch experience with new features, giving you precise control over what you capture.
- Search for Snipping Tool in the Start menu and launch it.
- Click New and choose one of the four snip types:
- Rectangular snip – drag a box around the area you need.
- Free‑form snip – draw an irregular shape.
- Window snip – capture a specific window.
- Full‑screen snip – grab the entire display.
- After you make a selection, the snip appears in the editor where you can annotate, copy, or save it.
The Snipping Tool is the go‑to solution when you need to capture a specific region, add arrows or text, and save the result in one step.
Method 4 – Shortcut Windows + Shift + S (Quick Snip)
For users who prefer a keyboard‑only workflow, the Windows + Shift + S shortcut launches the Snip & Sketch overlay instantly.
- Press Windows + Shift + S. A translucent toolbar appears at the top of the screen.
- Select the snip shape you need (rectangular, free‑form, window, or full‑screen).
- Drag to capture; the image is copied to the clipboard.
- Paste (Ctrl + V) into an email, document, or image editor, or click the notification to open the Snipping Tool for further editing.
This method is especially handy when you’re working in a presentation or chat window and don’t want to leave the current application.
Method 5 – Game Bar (For Gamers and Video Capture)
The Xbox Game Bar isn’t just for recording gameplay; it also includes a screenshot button.
- Press Windows + G to open the Game Bar overlay.
- Click the camera icon (or press Windows + Alt + PrtScn) to capture the current screen.
- Screenshots are saved in Videos → Captures by default.
Use the Game Bar when you’re already in a full‑screen app or game and want a fast, in‑context capture.
Choosing the Right Method for Your Workflow
- Full‑screen documentation: Windows + Print Screen or Game Bar.
- Partial or annotated images: Snipping Tool or Windows + Shift + S.
- Rapid clipboard copy: Classic PrtScn or Windows + Shift + S.
- Batch captures for testing: Windows + Print Screen combined with a naming convention.
Additional Tips & Best Practices
1. Use PNG for clarity. JPEG compresses the image and can introduce artifacts, which is undesirable for text or UI elements.
2. Organize your screenshots. Create subfolders by project or date to avoid a cluttered Pictures\Screenshots directory.
3. Leverage the built‑in annotation tools. The Snipping Tool lets you highlight, draw, and add text without leaving the app.
4. Combine shortcuts with cloud storage. Set the default screenshot folder to a synced OneDrive or Google Drive folder for instant backup.
Learn More with Expert Courses
If you want to deepen your productivity skills, 400,000+ professionals trust our courses. Our tutorials cover advanced screenshot techniques, automation with Power Automate, and best practices for creating visual documentation.
Conclusion
There are a number of ways to take a screenshot on a Windows 11 laptop, and mastering at least three of them ensures you can capture exactly what you need, when you need it. From the classic Print Screen key to the versatile Snipping Tool and the gaming‑focused Game Bar, each method serves a specific purpose. By applying the tips above and choosing the right tool for each scenario, you’ll be able to create clear, professional screenshots with confidence.





![3 Ways To Take A Screenshot In Windows 11 [2026 Guide]](https://i.ytimg.com/vi/ZJPJvTnU8hU/mqdefault.jpg)