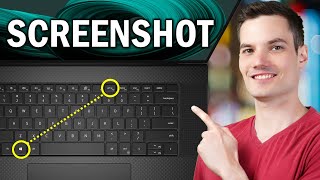
How To Screenshot In Laptop In Windows: A Complete Guide
Capturing your screen is an essential skill for students, professionals, and casual users alike. Whether you need to document a software bug, save a receipt, or share a funny meme, knowing how to screenshot in laptop in Windows can significantly improve your productivity. Windows offers several built-in tools that eliminate the need for third-party software.
Depending on whether you need to capture the entire screen, a specific window, or a custom area, there are different methods to choose from. This step-by-step tutorial will guide you through the most efficient ways to capture your display.
Method 1: Using the Snipping Tool (The Most Versatile Option)
The Snipping Tool is the primary application for screen captures in Windows 10 and 11. It allows for precision and immediate editing.
The Keyboard Shortcut: Press Windows Key + Shift + S.
Once you trigger this shortcut, the screen will dim, and a small menu will appear at the top of your display. You can choose from four different modes:
- Rectangular Snip: Click and drag to draw a box around the area you want to capture.
- Freeform Snip: Draw any shape around an object to capture it.
- Window Snip: Select a specific window (like a browser or folder) to capture only that element.
- Full-screen Snip: Captures everything currently visible on your monitor.
After taking the snip, the image is saved to your clipboard. A notification will also appear in the bottom right corner; clicking this allows you to crop, annotate, and save the image as a PNG or JPG file.
Method 2: The Print Screen (PrtSc) Key
The Print Screen key is the fastest way to capture your entire screen. Depending on your laptop model, you may need to press the Fn key simultaneously (e.g., Fn + PrtSc).
- Standard PrtSc: Copies the entire screen to your clipboard. You must then paste it (Ctrl + V) into an app like Paint, Word, or Discord to see the image.
- Windows Key + PrtSc: This is a more powerful version. Instead of just copying to the clipboard, Windows automatically saves the screenshot as a file. You can find these images in This PC > Pictures > Screenshots.
Method 3: Capturing a Single Window with Alt + PrtSc
If you have multiple windows open but only want to capture the active one without including your taskbar or background wallpaper, use the Alt + PrtSc shortcut.
This method captures only the window currently in focus and copies it to your clipboard. Like the standard Print Screen method, you will need to paste the image into an editor or a messaging app to save it.
Method 4: Using Xbox Game Bar for Gaming and Video
While primarily designed for gamers, the Xbox Game Bar is a great way to take screenshots of apps and games that might otherwise block standard capture tools.
- Press Windows Key + G to open the Game Bar overlay.
- Click the Camera icon in the "Capture" widget.
- The screenshot will be saved automatically to the Videos > Captures folder.
Comparison Summary: Which Method Should You Use?
Choosing the right method depends on your specific goal. Here is a quick breakdown:
- For quick sharing: Use Windows + Shift + S (Snipping Tool) because it allows for instant cropping and pasting.
- For archival/backups: Use Windows + PrtSc to save files directly to