How to Print Screen in New Windows: Complete Guide for PC and Laptop Users
Capturing what’s on your screen—commonly called “printing the screen”—has become a daily habit for many Windows users. Whether you need to document a software glitch, share a design mock‑up, or save a quick reference, knowing the right shortcut can save you time. In this article we’ll walk through every built‑in method Windows offers, plus a few handy tips, so you can choose the solution that fits your workflow.
Why Screenshots Matter
We could spend all day arguing the merits of a good screenshot, but the reality is simple: a clear image of your screen can communicate ideas faster than a paragraph of text. Professionals use screenshots for training, support tickets, and presentations, while casual users rely on them for sharing memes or preserving a moment in a game.
Overview of Screenshot Options in New Windows
There are a number of ways to take screenshots in modern versions of Windows, each designed for a specific scenario. Below is a quick snapshot of the options before we dive into step‑by‑step instructions.
- Print Screen (PrtScn) key – copies the whole screen to the clipboard.
- Windows + Print Screen – captures the entire screen and saves it automatically.
- Alt + Print Screen – captures only the active window.
- Windows + Shift + S – opens the Snip & Sketch overlay for custom selections.
- Snipping Tool / Snip & Sketch app – dedicated utilities for free‑form, rectangular, window, or full‑screen snips.
- Game Bar (Windows + G) – designed for gamers but works for any screen capture.
Method 1: Classic Print Screen (PrtScn)
This is the most straightforward technique and works on virtually every Windows PC or laptop.
- Arrange the content you want to capture on the screen.
- Press the Print Screen key (sometimes labeled PrtScn or PrtSc) on your keyboard.
- Open an image editor such as Paint, Paint 3D, or a third‑party program like Photoshop.
- Press Ctrl + V to paste the screenshot.
- Save the file in your preferred format (PNG is recommended for lossless quality).
This method copies the image to the clipboard, giving you the flexibility to edit before saving.
Method 2: Windows + Print Screen – Auto‑Save Full Screen
If you prefer a one‑step capture that saves directly to a folder, use this shortcut.
- Make sure the screen shows exactly what you need.
- Press Windows key + Print Screen simultaneously.
- You’ll see a brief dimming effect, confirming the capture.
- The screenshot is automatically stored in Pictures → Screenshots as a PNG file.
This is ideal for quickly documenting multiple steps without opening an editor each time.
Method 3: Alt + Print Screen – Capture the Active Window
When you only need the foreground window, this shortcut trims the excess.
- Select the window you want to capture.
- Press Alt + Print Screen.
- Paste the image into an editor (Ctrl + V) and save.
It’s especially handy for capturing error dialogs or specific application panels.
Method 4: Windows + Shift + S – Snip & Sketch Overlay
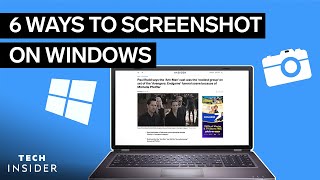
In this video, I’ll show you multiple ways to take screenshots on your Windows PC, starting with the versatile Windows + Shift + S shortcut.
- Press Windows + Shift + S. The screen dims and a small toolbar appears at the top.
- Choose one of four modes:
- Rectangular snip – drag to select a rectangle.
- Freeform snip – draw any shape.
- Window snip – click a window to capture it.
- Full‑screen snip – captures the entire display.
- The selected area is copied to the clipboard and a notification appears. Click the notification to open the image in the Snip & Sketch app for annotation.
- Save or share directly from the app.
This method gives you instant control over the capture area without leaving your current task.
Method 5: Using the Snipping Tool (or Snip & Sketch)
Microsoft’s built‑in Snipping Tool has been refreshed as “Snip & Sketch,” offering a lightweight interface for quick grabs.
- Search for “Snipping Tool” or “Snip & Sketch” in the Start menu and open it.
- Click New and select the snip shape you need (rectangular, freeform, window, or full‑screen).
- Drag to capture, then use the toolbar to annotate, copy, or save the image.
Whether you need a simple rectangle or a hand‑drawn outline, this utility covers it.
Method 6: Game Bar – Screenshots for Gaming and Beyond
Even if you’re not a gamer, the Game Bar provides a reliable capture method.
- Press Windows + G to open the Game Bar overlay.
- Click the camera icon or press Windows + Alt + Print Screen to take a screenshot.
- Files are saved in Videos → Captures by default.
The Game Bar also lets you record short video clips, which can be useful for tutorials.
Additional Tips for Efficient Screen Capturing
- Use the clipboard history (Windows + V) to retrieve recent screenshots without re‑capturing.
- Annotate quickly with the built‑in markup tools in Snip & Sketch—highlights, arrows, and text are just a click away.
- Change the default save location by moving the Screenshots folder in File Explorer (right‑click → Properties → Location).
- Combine shortcuts for faster workflows—for example, press Windows + Shift + S, then immediately hit Ctrl + V in an email draft.
Learning Resources and Further Training
If you want to deepen your knowledge, consider structured courses. 400,000+ professionals trust our courses—start your journey here. The curriculum includes a module titled “Learn how to take screenshot on PC and laptop in Windows,” which walks you through each method with video demos and practice files.
When to Choose Each Method
Whether you need a quick clipboard copy, an automatically saved file, or a custom‑shaped snip, the right tool depends on the context:
- Full‑screen documentation – use Windows + Print Screen.
- Focused window capture – Alt + Print Screen.
- Selective area with annotation – Windows + Shift + S followed by Snip & Sketch.
- Gaming or video capture – Game Bar.
- Frequent, repetitive captures – set up a macro or use third‑party tools like Greenshot (outside the scope of built‑in Windows features).
Conclusion
Learning how to print screen in new Windows doesn’t require additional software—Microsoft has built a suite of shortcuts and utilities that cover every scenario. By mastering the Print Screen key, Windows + Print Screen, Alt + Print Screen, Windows + Shift + S, the Snipping Tool, and the Game Bar, you’ll be equipped to capture anything from a single error dialog to a full‑screen gaming moment. Combine these techniques with quick annotation tools, and you’ll communicate visually with confidence.
Ready to practice? Open a document, try each shortcut, and see which fits your workflow best. And if you’d like a deeper dive, explore the professional courses linked above for step‑by‑step video lessons and downloadable practice files.