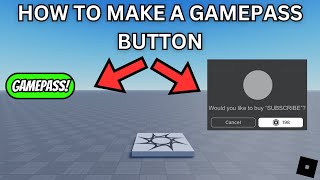
How to Make a Roblox Gamepass – A Complete Step‑by‑Step Guide
Roblox lets creators turn their ideas into games that millions can play, and a Gamepass is one of the most effective ways to monetize those creations. In this tutorial I show you exactly how to design, configure, and publish a Gamepass so you can start earning Robux while giving players exclusive content.
What Is a Roblox Gamepass?
A Roblox Gamepass is a virtual item that players purchase with Robux to unlock special features, items, or areas inside a specific game. Unlike regular in‑game items, a Gamepass is tied to the player’s account, meaning they keep the benefit across all sessions of that game.
Why Add a Gamepass to Your Game?
- Increase revenue: Each sale adds Robux directly to your developer account.
- Boost player engagement: Exclusive perks give players a reason to return and stay invested.
- Enhance the experience: Offer unique weapons, skins, or private zones that make your game stand out.
These benefits are why many successful Roblox developers rely on Gamepasses as a core part of their monetization strategy.
Prerequisites Before You Begin
- A verified Roblox account.
- A published game (or a game in development that you have permission to edit).
- Basic knowledge of Roblox Studio and the ability to upload assets.
If you already have these, you’re ready to move on. Hello! In this video, I quickly show you the exact steps inside Roblox Studio and the Developer Hub.
Step 1 – Open the Roblox Developer Hub
1. Log into Roblox and click the Develop tab at the top of the page.
2. Select My Creations and locate the game you want to add a Gamepass to.
3. Click the three‑dot menu next to the game and choose Configure Game. This opens the Developer Hub where you’ll manage assets, including Gamepasses.
Step 2 – Create a New Gamepass
In the left sidebar, click Game Passes, then press the Create Game Pass button.
- Name: Choose a clear, descriptive title (e.g., “VIP Sword Access”).
- Description: Write a concise description that tells players what they’ll receive.
- Price: Set the cost in Robux. Research similar passes in your genre to price competitively.
After filling in the fields, click Upload Image to add an eye‑catching thumbnail. The image should be 512 × 512 px and follow Roblox’s community standards.
Step 3 – Script the Gamepass Logic
Now that the pass exists, you need to tell your game how to react when a player owns it. Open your game in Roblox Studio and follow these steps:
- Insert a Script into ServerScriptService.
- Use the MarketplaceService API to check ownership:
Replace 12345678 with the actual ID shown on the Gamepass page. Adjust the benefit (e.g., giving a tool, unlocking a door, or enabling a UI element) to match your design.
Step 4 – Test the Pass Locally
Before publishing, test the script:
- Start a Play session in Studio.
- Open the Game Passes window (View → Game Passes) and click Buy to simulate a purchase.
- Confirm that the exclusive item appears in the player’s inventory.
If anything doesn’t work, check the output console for errors and verify that the Gamepass ID matches the one on the Developer Hub.
Step 5 – Publish and Promote Your Gamepass
Once testing is successful, return to the Developer Hub and click Publish. Your Gamepass is now live and can be purchased by any player.
Promotion tips:
- Add a Buy button in your game’s UI that links directly to the Gamepass page.
- Announce the new pass on your game’s Roblox group, Discord server, or social media.
- Offer a limited‑time discount to encourage early adopters.
Best Practices for Successful Gamepasses
- Offer real value: Players should feel the pass gives them a tangible advantage or unique experience.
- Keep pricing fair: Overpricing can deter purchases; underpricing may undervalue your work.
- Maintain transparency: Clearly describe what the pass includes to avoid confusion.
- Update regularly: Add new perks or improve existing ones to keep the pass attractive.
Common Mistakes to Avoid
1. Forgetting to script the benefit: A pass without functional rewards will frustrate buyers.
2. Using copyrighted images: Roblox may remove your pass if the thumbnail violates IP rules.
3. Setting the price too high: New players often have limited Robux; a reasonable price encourages more sales.
Wrap‑Up
Creating a Roblox Gamepass is a straightforward process that can significantly boost your game’s revenue and player satisfaction. Learn how to design a compelling pass, script the ownership check, test thoroughly, and promote effectively. Follow the steps above, and you’ll be ready to launch a successful Gamepass in no time.
Thank u guys for watching this video! If you found this guide helpful, please leave a like and subscribe for more tutorials. GuideRealm is the home of technology‑based how‑to’s, so stay tuned for the next guide.