How to Make a Logo: The Ultimate Step‑by‑Step Guide
Designing a logo is more than just picking a pretty font or a bright color. It’s the visual cornerstone of a brand, the first impression that tells customers who you are and what you stand for. Whether you’re launching a new business, rebranding an existing one, or simply want a personal mark for a side project, this guide walks you through every stage of the process—from concept to final files—so you can create a professional logo that works across every medium.
1. Clarify Your Brand Identity
Before any sketch appears on the screen, you need a clear picture of the brand you’re representing. Answer these questions in a short brief:
- Mission & Vision: What does the brand aim to achieve?
- Core Values: Which principles define the brand’s personality?
- Target Audience: Who are you speaking to, and what do they care about?
- Competitive Edge: What makes the brand different from others in the same space?
Write a one‑sentence “brand promise” that captures the essence. This sentence will become the north star for every design decision you make.
2. Choose the Right Logo Type
Logos come in several families, each with its own strengths. Selecting the right type early helps you stay focused.
- Wordmark: Text‑only logos (e.g., Google, Coca‑Cola) rely on typography to convey personality.
- Letterform: A single letter or initials (e.g., McDonald’s “M”) work well for brands with long names.
- Iconic/Symbol: A graphic symbol (e.g., Apple’s apple) can become instantly recognizable.
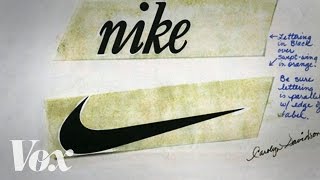
- Combination Mark: Text plus an icon (e.g., Nike’s swoosh with “Nike”) offers flexibility.
- Emblem: Text inside a shape or badge (e.g., Harley‑Davidson) gives a classic, authoritative feel.
For beginners, a combination mark often provides the best balance of clarity and visual interest.
3. Gather Inspiration (Without Copying)
Spend a focused 30‑minute research session on sites like Dribbble, Behance, or the “Design Inspiration” board on Skillshare. Look for patterns in color, shape, and spacing that resonate with your brand brief. Remember, the goal is to understand trends, not to replicate them.
4. Pick Your Design Tools
Choose a tool that matches your skill level and budget:
- Adobe Illustrator: Industry‑standard vector editor; perfect for precise, scalable logos.
- Affinity Designer: A cost‑effective alternative with a similar feature set.
- Canva: Browser‑based, drag‑and‑drop interface; great for quick mockups.
- Logojoy or Looka: AI‑driven generators that produce starter concepts you can refine.
If you’re already comfortable with WordPress, you might recall the “Build Your Own WordPress Website in Just 10 Minutes” tutorial (see YouTube link)—the same mindset of rapid, focused creation applies to logo design.
5. Sketch Rough Concepts
Start with pen and paper. Aim for 10–15 quick thumbnails, each exploring a different direction:
- Vary the logo type (wordmark vs. icon).
- Experiment with shape language—rounded vs. angular.
- Play with negative space (think of the hidden arrow in the FedEx logo).
Don’t worry about perfection; the purpose is to generate options that you can later refine digitally.
6. Refine Digitally
Transfer your strongest sketches into your chosen design software. Follow these best‑practice checkpoints:
- Simplicity: Keep elements minimal; a cluttered logo loses impact at small sizes.
- Scalability: Test the logo at 16 px, 64 px, and 512 px. It should remain clear at every scale.
- Versatility: Ensure it works in full color, black‑and‑white, and reversed (light on dark).
- Color Theory: Choose 1–3 colors that reflect brand personality. Use a limited palette to maintain consistency.
- Typography: If using text, select a typeface that aligns with the brand tone—serif for tradition, sans‑serif for modernity, script for elegance.
During this stage, you might recall the “Build an Amazing Website in Less than 1 Hour” tutorial (YouTube link)—both processes benefit from a clear workflow and iterative testing.
7. Seek Constructive Feedback
Share 3–4 refined options with trusted peers, potential customers, or a design community (Skillshare classes often include critique sessions). Ask specific questions:
- Does the logo convey the intended brand promise?
- Is it memorable after a quick glance?
- Does it work in black‑and‑white?
Incorporate the most useful suggestions, then finalize the design.
8. Prepare Final Files
Export the logo in a variety of formats to cover every use case:
- Vector formats: AI, EPS, SVG – essential for print, signage, and scaling.
- Raster formats: PNG (transparent background), JPEG (for web), GIF (if animation is needed).
- Color variations: Full‑color, monochrome, and reversed versions.
Organize the files into clearly labeled folders (e.g., “Logo‑Primary,” “Logo‑Mono,” “Logo‑SVG”) and include a short style guide that outlines clear space, minimum size, and color codes.
9. Protect and Register Your Logo
Once the logo is finalized, consider trademark registration to protect your brand identity. A simple search on the USPTO or your local trademark office can confirm that the design is unique. While this step isn’t a design task, it’s a crucial part of the overall branding process.
10. Apply Your Logo Consistently
With the logo ready, integrate it across all brand touchpoints—website header, social media profiles, business cards, and merchandise. Consistency reinforces recognition. If you’re using Squarespace for your site, the sponsored 10% OFF code “PATERSON” (Squarespace link) can help you launch a polished site quickly, ensuring your new logo looks its best from day one.
Bonus: Keep Learning
Design is an evolving skill. The “Ultimate” design courses on platforms like Skillshare, the 1‑hour full courses on logo theory, and ongoing tutorials can deepen your understanding of typography, color psychology, and brand strategy. Treat each logo project as a learning opportunity, and you’ll see steady improvement over time.
Conclusion
Making a logo is a blend of strategic thinking and creative execution. By defining your brand identity, choosing the right logo type, sketching ideas, refining them with professional tools, gathering feedback, and delivering polished final files, you can craft a mark that not only looks great but also tells a compelling story. Follow this step‑by‑step process, leverage the resources mentioned, and you’ll be equipped to design a memorable logo that stands the test of time.