How To Make Hot Chocolate
When the weather turns chilly, a steaming mug of hot chocolate is the perfect way to warm up and treat yourself. Making hot chocolate at home is easy, inexpensive, and lets you control the flavor, sweetness, and texture. Below you’ll find a complete guide that covers everything from the basic recipe to creative twists, so you can enjoy the best homemade hot cocoa whenever the mood strikes.
Why Make Hot Chocolate at Home?
Store‑bought mixes often contain artificial flavors, excess sugar, and preservatives. By making hot chocolate yourself you can:
- Choose high‑quality ingredients – real cocoa powder, fresh milk, and natural sweeteners.
- Adjust sweetness to suit your taste, whether you prefer a light sip or a decadently sweet treat.
- Experiment with flavors such as spices, extracts, or a splash of liqueur.
- Save money – a few pantry staples stretch far beyond a single packet of pre‑made mix.
Getting the Basics Right
Here’s the classic foundation for a smooth, velvety cup of hot chocolate:
- Ingredients (serves 1):
- 1 cup milk – dairy or any non‑dairy alternative (almond, oat, soy, etc.).
- 2 – 3 tablespoons unsweetened cocoa powder.
- 1 tablespoon granulated sugar (adjust to taste).
- ¼ teaspoon salt – enhances the chocolate flavor.
- ¼ teaspoon vanilla extract (optional, but adds depth).
- Step‑by‑step:
- Heat the milk in a small saucepan over medium heat. Watch for tiny bubbles forming around the edges – you want it just below a boil.
- While the milk warms, whisk together cocoa powder, sugar, and salt in a separate bowl.
- When the milk is hot, slowly whisk the dry mixture into it. Keep stirring to avoid lumps; a small whisk or a frother works well.
- Continue to heat for another minute, allowing the flavors to meld. Do not let the mixture boil vigorously, or the milk may scorch.
- Remove from heat and stir in vanilla extract, if using.
- Pour into your favorite mug and add toppings of choice.
Making It Your Own – Creative Variations
Want to go beyond the classic cup? Below are popular variations that keep the process simple while delivering new taste experiences.
- Spiced Hot Cocoa – Add a pinch of ground cinnamon, nutmeg, or cardamom with the cocoa powder. For a warm holiday feel, try a dash of ground cloves.
- Mexican Hot Chocolate – Stir in ¼ teaspoon of ground cinnamon, a pinch of cayenne pepper, and a splash of vanilla. The subtle heat pairs beautifully with the chocolate.
- Mocha Boost – Mix in a shot of freshly brewed espresso or 1 – 2 teaspoons of instant coffee granules for a coffee‑chocolate hybrid.
- Minty Fresh – Add a drop of peppermint extract or a few fresh mint leaves while the milk heats. Remove the leaves before serving.
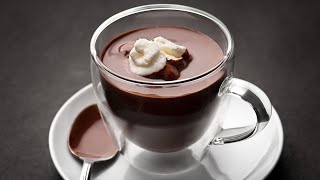
- Rich & Creamy – Replace half of the milk with heavy cream or use a blend of half‑and‑half for an indulgent texture.
- Vegan Delight – Use coconut milk or oat milk, sweeten with maple syrup, and choose a dairy‑free chocolate bar melted into the mixture.
Homemade Hot Cocoa Mix – A Handy Pantry Staple
If you love the convenience of a quick cup, consider preparing this homemade hot cocoa mix. It stores well and lets you “Get” a delicious drink in seconds.
- Combine 1 cup unsweetened cocoa powder, 1 cup granulated sugar, and ½ cup powdered milk (or a dairy‑free powdered alternative) in a large bowl.
- Whisk until the mixture is uniform and free of clumps.
- Transfer to an airtight container. Label with the date; the mix stays fresh for up to six months.
To use, stir 2‑3 tablespoons of the mix into 1 cup of hot water or warmed milk. Adjust the amount for a richer or lighter cup, then finish with your favorite topping.
Tips for the Perfect Cup
- Use real cocoa powder – Dutch‑processed cocoa yields a smoother, less acidic flavor, while natural cocoa offers a brighter, more robust taste.
- Heat gently – Over‑heating can cause the milk to develop a skin or scorch, resulting in a grainy texture.
- Whisk vigorously – A small whisk or handheld frother creates a silky mouthfeel and helps dissolve the cocoa fully.
- Season at the end – Adding salt, vanilla, or spices after the mixture is off the heat preserves their aromatic qualities.
- Serve immediately – Hot chocolate thickens as it cools; enjoy it while it’s still steaming for the best experience.
Serving Ideas and Garnishes
Looking for the best homemade presentation? Try these simple garnishes:
- Whipped cream topped with a dusting of cocoa powder.
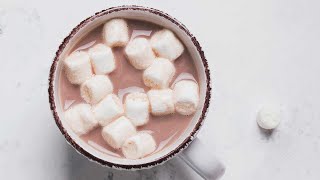
- Mini marshmallows that melt into sweet pockets.
- Shaved dark chocolate or chocolate curls for an elegant finish.
- A drizzle of caramel or hazelnut spread for extra richness.
- Crushed peppermint candy for a festive touch.
Storing Leftover Hot Chocolate
If you happen to make more than you can drink, let the hot chocolate cool to room temperature, then refrigerate in a sealed container. Reheat gently on the stove or in the microwave, adding a splash of milk to restore the original consistency.
Conclusion – Your Go‑To Guide for Homemade Hot Cocoa
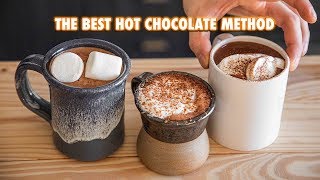
Making hot chocolate at home is a rewarding ritual that lets you control every element of the drink, from the type of milk to the level of sweetness and the addition of spices or espresso. Today I made all of the types of hot cocoa listed above, and each one proved how simple “Making” a cup can become a creative adventure. Whether you’re after a classic, a spicy Mexican version, or a velvety vegan treat, the basic method stays the same, and the possibilities are endless.
So, grab your favorite mug, gather the ingredients, and start experimenting. With this guide you’ll be able to enjoy a comforting, perfectly balanced cup of hot chocolate any time you want. Cheers to warm moments and delicious sips!