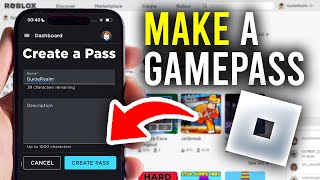
How To Make Gamepass In Roblox iPhone: A Complete Guide
Creating a Gamepass is one of the most effective ways to monetize your experience on Roblox. Whether you are building a simulator, a roleplay game, or a hangout spot, Gamepasses allow you to offer exclusive perks, items, or abilities to your players. While many users believe you need a desktop computer to manage game assets, you can easily handle the process using your mobile device.
If you want to learn how to make Gamepass in Roblox iPhone, follow this step-by-step guide to navigate the mobile browser interface and set up your items for sale.
Prerequisites for Creating Gamepasses
Before you begin, ensure you have a Roblox account and at least one published game. You cannot create a Gamepass for a game that has not been created or published to your profile. Additionally, while the Roblox app is great for playing, you will need to use your iPhone’s web browser (Safari or Chrome) to access the Creator Dashboard, as the mobile application does not currently support asset creation.
Step 1: Access the Roblox Creator Dashboard
Here is how you can access the dashboard on your mobile device:
- Open Safari or your preferred mobile browser.
- Navigate to create.roblox.com.
- Log in using your Roblox credentials.
- If the site prompts you to use the app, look for the "Aa" icon in the address bar (on Safari) and select Request Desktop Website. This is a crucial step to ensure the full dashboard features load correctly on your iPhone.
Step 2: Locate Your Experience
Once you are on the Creator Dashboard, you will see a list of all experiences associated with your account. Follow these steps to select the right game:
- Tap on the game thumbnail where you want to add the Gamepass.
- This will open the Experience Dashboard.
- Locate the menu button, usually represented by three horizontal lines in the top left corner.
- Scroll down to the Associated Items section. If you do not see it, tap on Monetization Products to expand the menu.
- Select Passes from the list.
Step 3: Create Your Gamepass
Now that you are in the Passes section, you can start the creation process:
- Tap the Create a Pass button.
- Upload an image for your Gamepass. This can be a logo or an icon that represents the perk.
- Enter a Name for your Gamepass. Make it descriptive so players know exactly what they are purchasing.
- Provide a Description. Use this space to explain the benefits the player will receive upon purchase.
- Tap Create Pass.
Step 4: Configure the Price
Simply creating the pass is not enough; you must set a price to make it available for purchase. Learn how to finalize the settings here:
- After creating the pass, you will be redirected to the list of your passes. Tap on the newly created Gamepass to open its configuration page.
- Open the menu again (the three lines in the top left) and look for the Sales tab.
- Toggle the switch for Item for Sale to the "On" position.
- Enter the amount of Robux you want to charge for the pass.
- Tap Save Changes.
Tips for Successful Gamepasses
Now that you know how to make Gamepass in Roblox iPhone, consider these tips to maximize your sales:
- Clear Value: Ensure the perk offered is worth the price. Common examples include "Speed Coil," "VIP Room Access," or "Double Currency."
- Professional Icons: Use high-quality images for your Gamepass. A professional-looking