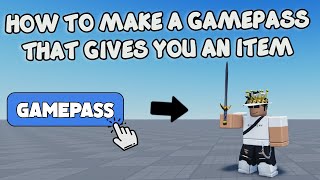
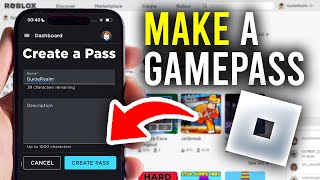
How to Make a Gamepass in Roblox for Robux
Hello! In this video I show you how to add a Gamepass to your Roblox experience, and in this tutorial I show you every step you need to earn Robux safely and effectively. Whether you’re new to Roblox development or looking to boost your game’s revenue, this guide will walk you through the process from start to finish.
What Is a Roblox Gamepass?
A Gamepass is a purchasable item that gives players permanent access to exclusive content inside a specific game. Unlike one‑time purchases, a Gamepass is tied to a player’s account, so they keep the benefit forever. Common uses include:
- Unlocking special weapons or tools
- Opening secret areas or maps
- Granting VIP status or custom avatars
Because each purchase is paid in Robux, creating a well‑designed Gamepass can become a reliable source of income for developers.
Why Create a Gamepass?
Here’s how you can benefit from adding Gamepasses to your game:
- Monetization: Every sale converts directly into Robux, which you can cash out or reinvest.
- Player Retention: Exclusive perks encourage players to stay longer and return for more content.
- Community Building: VIP or “member‑only” features foster a sense of belonging among paying players.
Learn how to balance price and value so your Gamepass feels worth the cost while still attracting buyers.
Step‑by‑Step Guide to Creating a Gamepass
In this tutorial I show you the exact workflow inside Roblox Studio and the Creator Dashboard. Follow these steps, and you’ll have a live Gamepass ready for purchase.
1. Prepare Your GameBefore you add a Gamepass, make sure the content you want to lock is ready. This could be a new map, a special tool, or a UI element. Use Collections or Folder objects to keep the exclusive assets organized, then set their Visible property to false until a player owns the pass.
2. Open the Creator Dashboard- Log in to Roblox and click the Creator tab at the top of the page.
- Select Games and choose the title you want to add a Gamepass to.
- On the left sidebar, click Monetization → Game Passes.
- Press the Create Game Pass button.
- Upload an eye‑catching icon (512 × 512 px is recommended). The icon appears in the Roblox store, so make it clear and attractive.
- Enter a concise name and a description that tells players exactly what they’ll receive.
- Set a price in Robux. For most indie games, 50 – 150 Robux works well; adjust based on the value of the content.
- Click Save. Your Gamepass now has a unique ID you’ll need for scripting.
Open Roblox Studio, locate the ServerScriptService, and add a new Script. Use the following template (replace YOUR_GAMEPASS_ID with the ID you just created):
local MarketplaceService = game:GetService("MarketplaceService") local PASS_ID = YOUR_GAMEPASS_ID game.Players.PlayerAdded:Connect(function(player) local success, hasPass = pcall(function() return MarketplaceService:UserOwnsGamePassAsync(player.UserId, PASS_ID) end) if success and hasPass then -- Example: make a secret door visible local secretDoor = workspace:FindFirstChild("SecretDoor") if secretDoor then secretDoor.Transparency = 0 secretDoor.CanCollide = true end end end)This script checks each joining player for ownership of the pass and unlocks the designated content. You can expand the logic to grant tools, change player stats, or display UI elements.
5. Test Your Gamepass- Publish the game to Roblox.
- Enter Play mode in Studio and use the Test tab to simulate a player who owns the pass.
- Verify that the exclusive content appears as expected.
Testing ensures a smooth experience for real buyers and prevents “pay‑to‑win” frustrations.
Tips for a Successful Gamepass
- Make it valuable: Offer something players can’t get elsewhere in the game.
- Keep the price fair: Research similar passes in popular games and price yours competitively.
- Promote inside your game: Use in‑game billboards, pop‑ups, or chat messages to remind players of the benefits.
- Update regularly: Add new perks or seasonal bonuses to keep the pass attractive over time.
- Gather feedback: Listen to your community and adjust the content or price based on their suggestions.
Common Pitfalls to Avoid
Learn how to prevent these mistakes before they affect your revenue:
- Hard‑coding the pass ID in multiple scripts: Keep the ID in a single ModuleScript to make future updates easier.
- Forgetting to set CanCollide or Transparency correctly: Players might see invisible walls if the properties aren’t adjusted.
- Overpricing: A price that feels too high can deter purchases and hurt your game’s reputation.
Conclusion
By following the steps above, you now know exactly how to make a Gamepass in Roblox for Robux. From preparing exclusive content to scripting the ownership check, each part of the process is designed to be straightforward and scalable. Remember to keep the pass valuable, price it wisely, and promote it within your community.
Learn more about Roblox development, monetization strategies, and advanced scripting on GuideRealm – the home of technology‑based how‑to’s, guides, and tutorials. For more videos like this then please leave a like, and subscribe for future updates!