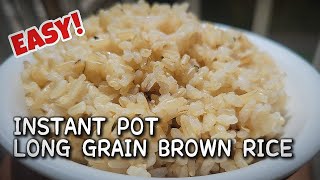
How To Make Brown Rice In Instant Pot
If you've never made brown rice in an Instant Pot, you might think it’s a complicated process. In reality, the method is straightforward, quick, and yields perfectly fluffy grains every time. Below you’ll find a step‑by‑step guide, helpful tips, and answers to common questions—all designed to help you master brown rice with minimal effort.
Why Choose the Instant Pot for Brown Rice?
The Instant Pot combines the speed of pressure cooking with the convenience of a set‑and‑forget appliance. Compared with stovetop cooking, it reduces the risk of under‑ or over‑cooking, eliminates the need for constant stirring, and frees up your stovetop for other dishes. The result is a consistent, perfect texture that’s ideal for meal prep, side dishes, or base bowls.
What You’ll Need
- 1 cup brown rice (long‑grain or short‑grain)
- 1 ¼ cups water (or low‑sodium broth for extra flavor)
- Fine‑mesh strainer
- Measuring cup
- Instant Pot (any 6‑quart model or larger)
Step‑by‑Step Instructions
- Rinse the rice. Place the brown rice in a fine‑mesh strainer and rinse under cold running water for 30 seconds. This removes excess starch and prevents the grains from sticking together.
- Add rice and liquid. Transfer the rinsed rice to the Instant Pot inner pot. Pour in 1 ¼ cups of water (or broth). For a softer texture, you can increase the liquid to 1 ½ cups.
- Season (optional). Add a pinch of salt, a drizzle of olive oil, or a bay leaf if you like extra flavor.
- Seal and set. Close the lid, turn the steam release handle to “Sealing,” and select the “Pressure Cook” (or “Manual”) function. Set the timer for 20 minutes on high pressure.
- Natural pressure release. When the cooking cycle ends, let the pot sit for 10 minutes. This natural release allows the rice to finish steaming gently.
- Quick release. After the 10‑minute rest, carefully turn the steam release handle to “Venting” to release any remaining pressure.
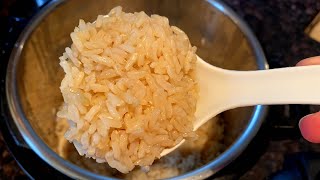
- Fluff and serve. Open the lid, remove the bay leaf if used, and fluff the rice with a fork. Serve immediately or keep warm on the “Keep Warm” setting for up to an hour.
Follow My Tips to Get the Best Results
- Measure accurately. The 1:1.25 rice‑to‑water ratio works for most brands, but if your rice is older or you prefer a softer bite, add a little extra liquid.
- Let it rest. The 10‑minute natural release is crucial; it lets the steam finish cooking the grains without making them mushy.
- Use broth. Cooking in low‑sodium chicken or vegetable broth adds depth without extra effort.
- Avoid the “quick‑release” trap. Releasing pressure immediately after cooking can cause the rice to be under‑cooked and gummy.
Variations and Flavor Ideas
Once you’re comfortable with the basic method, experiment with these simple variations:
- Herb‑infused rice: Add a sprig of thyme or rosemary to the pot before cooking.
- Coconut brown rice: Replace half the water with coconut milk for a subtle tropical flavor.
- Spiced rice: Stir in a teaspoon of cumin, turmeric, or smoked paprika for a quick side dish that pairs well with grilled proteins.
Common Questions
Can I double the recipe?Yes. The Instant Pot can handle up to 4 cups of dry brown rice (about 8 cups cooked). Just maintain the same 1:1.25 ratio and increase the cooking time by 2‑3 minutes if you’re cooking a very large batch.
How do I store leftovers?Cool the rice completely, then transfer it to an airtight container. It will keep in the refrigerator for 3‑4 days. Reheat in the microwave with a splash of water, or return to the Instant Pot on “Keep Warm” for a few minutes.
What if the rice is too firm?If the grains are still a bit hard, add ¼ cup of water, stir, seal the lid, and pressure‑cook for an additional 2 minutes. Let it naturally release for 5 minutes before opening.
Video Demonstration
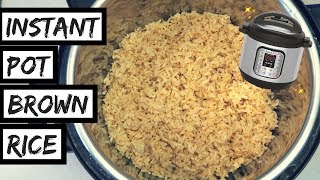
In this video I show you the entire process from rinsing to fluffing, so you can see the texture at each stage. Watching the steps in action can boost your confidence and help you avoid common pitfalls.
Ready to Upgrade Your Kitchen Skills?
Cooking brown rice in an Instant Pot is just the beginning. For more detailed recipes, meal‑planning ideas, and step‑by‑step tutorials, ORDER MY NEW COOKBOOK TODAY in hardback or digital pdf! Visit https://triedtestedandtrue.com/enjoy-cookbook/ and enjoy a collection of tried‑and‑true dishes that make everyday cooking effortless.
Final Thoughts
Let’s recap: rinse the rice, use the right water ratio, set the Instant Pot to 20 minutes, allow a 10‑minute natural release, and fluff before serving. Follow my tips, experiment with flavors, and you’ll have a reliable, perfect batch of brown rice ready whenever you need it. Happy cooking!