How to Make Brown in Watercolor: A Complete Beginner’s Guide
Brown is one of the most versatile hues in watercolor. It can suggest earth, wood, skin tones, shadows, and even the warm glow of a sunrise. Yet many beginners assume that creating a rich, natural brown is difficult. In reality, with a limited transparent palette, a few simple mixing rules, and a bit of practice, you can produce a full spectrum of browns—from light sand to deep chocolate. This guide walks you through the theory, the materials, and step‑by‑step techniques so you can start mixing confident browns today.
Why a Limited Transparent Palette Works
Professional watercolor artists often start with a small set of transparent pigments. Transparent colors allow the white of the paper to shine through, creating luminous washes that feel more “alive” than opaque mixes. When you limit yourself to a few reliable pigments, you also avoid the muddiness that can occur when too many colors are combined.
- Yellow ochre or cadmium yellow – a warm, earthy yellow.
- Burnt sienna or raw umber – a natural brown that serves as a base.
- Ultramarine blue or Payne’s gray – a cool tone for depth.
- Alizarin crimson (optional) – adds a reddish warmth when needed.
These four pigments are enough to create every brown you’ll need for landscapes, portraits, and still‑life studies.
The Color Theory Behind Brown
Brown is essentially a desaturated orange, red, or green. In watercolor terms, you achieve it by mixing a warm color (yellow or red) with a cool color (blue or green) in roughly equal parts, then adjusting the value with additional warm or cool pigments. The classic “60‑30‑10” rule is a helpful starting point:
- 60 % dominant color – usually a warm yellow or red.
- 30 % secondary color – a cool blue or green.
- 10 % accent color – a darker pigment such as Payne’s gray or a touch of burnt sienna.
From this base you can shift the hue by adding more of one component or by lightening/darkening with water or a darker pigment.
Step‑by‑Step: Mixing Your First Browns
1. Prepare a Light WashStart with a generous amount of water on your palette. Add a small amount of yellow ochre and spread it into a thin, transparent wash. This will be the foundation for a warm brown.
2. Add the Cool CounterpartWhile the yellow wash is still wet, introduce a touch of ultramarine blue. Use a clean brush to swirl the colors together. You’ll notice the mixture shift toward a muted olive—this is the beginning of brown.
3. Adjust Value and Temperature- For a warmer brown, add a little more yellow ochre or a drop of alizarin crimson.
- For a cooler brown, increase the ultramarine or add a hint of Payne’s gray.
- To deepen the tone, introduce a tiny amount of burnt sienna or raw umber.
Always paint a swatch on the same paper you’ll be working on. Let it dry; the color will shift slightly as the water evaporates. Adjust by adding more pigment or water until you reach the desired hue.
Creating Specific Shades
Below are four common brown families and the exact mixing ratios you can use as a reference point. Adjust the water to keep the washes transparent.
- Warm Golden Brown: 2 parts yellow ochre, 1 part burnt sienna, a pinch of alizarin crimson.
- Cool Earth Brown: 2 parts raw umber, 1 part ultramarine blue, a dash of Payne’s gray.
- Rich Chocolate: 1 part raw umber, 1 part burnt sienna, ½ part ultramarine, a tiny speck of alizarin crimson.
- Light Sand: 3 parts yellow ochre, 1 part water, a trace of burnt sienna for warmth.
Advanced Techniques: Glazing and Staining
Once you’re comfortable with basic mixes, explore glazing—applying multiple transparent layers to build depth. For example, lay down a light warm brown wash, let it dry, then glaze a cooler brown over the shadows. The underlying warm tone will peek through, creating a three‑dimensional effect.
Another useful method is the “tea‑to‑butter” stain, a simple experiment that mimics natural brown pigments. Brew a strong cup of black tea, let it cool, then add a few drops of melted butter (or a butter‑like oil medium). The mixture creates a soft, earthy stain that can be used for background washes or as a base for further glazing. This technique is especially handy for quick studies or when you want a natural, organic texture.
Practical Tips for Consistency
- Keep a mixing notebook. Record the exact ratios and water amounts for each brown you create. Over time you’ll develop a personal “brown library.”
- Use a limited palette. Fewer pigments mean fewer chances for accidental mud.
- Work from light to dark. Start with the lightest wash, then add darker glazes. This preserves the transparency that makes watercolor unique.
- Mind the paper. Rough or cold‑pressed paper holds more water, giving you softer transitions; hot‑pressed paper yields sharper edges.
- Watch the drying shift. Colors often become slightly cooler as they dry. Test dry swatches before committing to large areas.
Learning Resources
If you’re just beginning, consider enrolling in a Beginners Drawing Course that includes watercolor fundamentals. The My Art and Creativity Podcast frequently discusses color mixing and offers interviews with professional watercolorists. For visual inspiration, follow my Instagram (link in the course description) where I post weekly brown‑mixing challenges and step‑by‑step videos.
Putting It All Together: A Simple Practice Exercise
- Set up a palette with yellow ochre, burnt sienna, raw umber, ultramarine blue, and Payne’s gray.
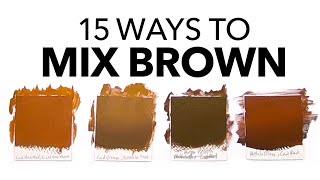
- Create four swatches: warm brown, cool brown, deep chocolate, and light sand, using the ratios above.
- Allow each swatch to dry, then glaze a second, contrasting tone over each (e.g., glaze cool brown over warm brown).
- Observe how the layers interact and note any adjustments needed for future mixes.
This exercise reinforces the 60‑30‑10 rule, teaches you how transparent layers affect value, and builds confidence in controlling brown tones.
Conclusion
Mixing brown in watercolor is not a mystery reserved for seasoned artists. By starting with a limited transparent palette, applying the 60‑30‑10 mixing principle, and practicing glazing and staining techniques, you can produce a full range of natural, expressive browns. Keep a record of your mixes, experiment with the tea‑to‑butter stain for quick earthy washes, and use the resources linked above to deepen your understanding. With consistent practice, brown will become a reliable, go‑to color in your watercolor toolbox, ready to bring depth and warmth to any painting.