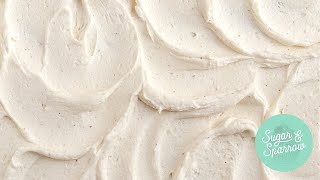
How to Make Brown Icing: A Complete Tutorial
Brown icing adds a warm, sophisticated touch to cakes, cupcakes, and cookies. Whether you’re decorating a birthday cake or recreating Grandma’s classic recipes, mastering the color and flavor of brown icing is easier than you think. This guide walks you through the science of color mixing, the role of browned butter for extra depth, and tips for using royal icing. Follow the step‑by‑step instructions, watch the recommended tutorial videos, and you’ll be creating rich, nutty brown icing in no time.
Why Brown Icing Is Different
Most frosting recipes start with a white base, but brown icing requires careful color balancing. The goal is a natural, medium brown that looks appealing without appearing muddy. Using the correct ratio of primary colors—yellow, red, and blue—ensures a true brown hue while keeping the flavor neutral, allowing any added butter or extracts to shine.
The Perfect Color Ratio
The key to a consistent brown is the 1 : 1 : 1 ratio of yellow : red : blue. By mixing equal parts of these three primary food colorings, you create a balanced brown that can be lightened or darkened as needed.
- Yellow – adds warmth and prevents the brown from becoming too purple.
- Red – deepens the tone and counters any greenish tint.
- Blue – provides the necessary darkness for a true brown.
Start with a small amount of each (about ¼ teaspoon per cup of frosting) and adjust gradually. Adding too much at once can quickly turn the mixture gray or black.
Ingredients You’ll Need
- White frosting or royal icing (store‑bought or homemade)
- Yellow, red, and blue gel food coloring (gel works best for vibrant color without thinning the icing)
- Optional: 2 tablespoons browned butter for flavor
- Mixing bowl, spatula, and a small whisk
Step‑by‑Step: Making Brown Icing
1. Prepare the base. If you’re using buttercream, beat softened butter, powdered sugar, a pinch of salt, and a splash of milk or cream until light and fluffy. For royal icing, combine powdered sugar, meringue powder, and a few drops of water until you reach a smooth, pipeable consistency.
2. Add browned butter (optional). In a small saucepan, melt butter over medium heat. Continue cooking, swirling the pan, until the butter turns a deep amber and releases a nutty aroma—about 5 minutes. Strain out any solids, let it cool slightly, then whisk it into your frosting. The browned butter adds a subtle, caramel‑like depth that pairs beautifully with the brown color.
3. Mix the colors. Add ¼ teaspoon of yellow gel to the frosting and stir until fully incorporated. Follow with ¼ teaspoon of red, then ¼ teaspoon of blue, mixing thoroughly after each addition. Observe the color change; if the brown is too light, add another ⅛ teaspoon of each color, mixing well each time.
4. Adjust tone. For a darker, richer brown, increase the blue slightly (⅛ teaspoon) while keeping yellow and red equal. For a lighter, caramel‑like shade, add a touch more yellow and reduce blue.
5. Test and perfect. Scoop a small amount onto a plate and let it sit for a minute. The true color will appear once the frosting settles. If the hue is off, tweak with additional drops of the appropriate color.
6. Use or store. Your brown icing is ready for piping, spreading, or dipping. If not using immediately, cover the bowl with plastic wrap touching the surface to prevent a crust from forming. Store in the refrigerator for up to 5 days; bring to room temperature and re‑whip before using.
Royal Icing and Brown Color
If you prefer a glossy, hard‑set finish, royal icing is the way to go. This video shows you how to color royal icing using the same 1 : 1 : 1 ratio, ensuring a consistent brown that dries without cracking. Royal icing holds its shape well for intricate decorations like flowers, borders, and lettering.
Helpful Tutorial Videos
Visual learners will benefit from the following free resources:
- “How to Make Brown Butter Icing” – a 5‑minute YouTube tutorial that demonstrates melting butter to a nutty brown and folding it into frosting.
- “Coloring Royal Icing – Brown Edition” – step‑by‑step guidance on achieving the perfect brown using gel colors.
- “Grandma’s Classic Brown Icing” – a nostalgic video where a baker shares family tips, including the exact color ratios and the secret of adding a pinch of cocoa for extra depth.
Grandma’s Secret Touch
Many home bakers swear by Grandma’s tip: after achieving the desired brown hue, stir in a pinch of unsweetened cocoa powder. The cocoa deepens the color and adds a subtle chocolate undertone without overpowering the frosting’s sweetness. This trick works especially well with buttercream and is a favorite for holiday cookies.
Common Mistakes and How to Avoid Them
- Over‑coloring. Adding too much gel can thin the icing and create a grayish tone. Always start with small amounts.
- Uneven mixing. Use a whisk or electric mixer on low speed to ensure the color distributes evenly.
- Skipping browned butter. If you want flavor, don’t omit the browned butter step; it adds a nutty richness that plain icing lacks.
- Using liquid food coloring. Liquid colors dilute the frosting, making it runny. Gel colors keep the consistency thick and pipeable.
Final Thoughts
Creating brown icing is a blend of art and science. By mastering the 1 : 1 : 1 color ratio, incorporating browned butter for flavor, and using the right tools, you can produce a frosting that looks as good as it tastes. Whether you’re following a tutorial video, borrowing Grandma’s secret tip, or experimenting with royal icing, the steps outlined here will guide you to a perfect, rich brown finish every time.
Now that you know how to make brown icing, grab your favorite cake, whip up a batch, and enjoy the warm, nutty flavor that only a well‑colored, butter‑infused frosting can provide.