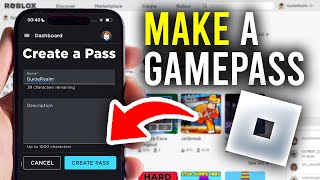
How To Make A Gamepass On Roblox With Mobile
Whether you are an aspiring developer or a player looking to earn Robux from your creations, knowing how to monetize your experiences is essential. Many users assume that creating a Gamepass requires a powerful PC and the Roblox Studio software, but that is not the case. You can easily create and sell Gamepasses directly from your smartphone or tablet using a web browser.
A Gamepass is a special item that players can purchase to gain a permanent advantage, a special ability, or a unique cosmetic item within your specific game. Because the mobile app version of Roblox has limited creator tools, you will need to use a "Desktop Mode" workaround to access the developer dashboard. Here is everything you need to know to get started.
Preparing Your Mobile Browser
The first thing you must understand is that the standard Roblox mobile app does not allow you to manage Gamepasses. To bypass this, you must use a mobile web browser such as Google Chrome, Safari, or Firefox. Here is how you can set up your browser for the best experience:
- Open your browser: Launch your preferred browser and go to the official Roblox website.
- Log in: Sign into your account as you normally would.
- Enable Desktop Site: This is the most critical step. In Chrome, tap the three dots in the top right corner and check the box for "Desktop site." In Safari, tap the "AA" icon in the address bar and select "Request Desktop Website."
By switching to the desktop version, the website will believe you are using a computer, granting you access to the "Create" tab and the full developer dashboard.
Step-by-Step Guide to Creating Your Gamepass
Once you are in desktop mode, you can begin the creation process. Follow these steps to set up your first offer:
- Access the Create Tab: Click on the "Create" link located in the top navigation bar of the Roblox homepage.
- Enter the Dashboard: You will be redirected to the Creator Dashboard. Here, you will see a list of your "Experiences." Every Roblox user has a default place (e.g., "[Username]'s Place"), so you do not need to build a full game first to make a Gamepass.
- Select Your Experience: Click on the game or experience you want the Gamepass to be associated with.
- Navigate to Associated Items: In the left-hand sidebar menu, look for the "Associated Items" section. Click on this to open a new menu.
- Create a Pass: You will see three tabs: Passes, Badges, and Developer Products. Select the "Passes" tab and click the "Create a Pass" button.
Customizing Your Gamepass
Now that you have initiated the creation process, you need to make your Gamepass appealing to potential buyers. Learn how to optimize these settings to increase your sales:
1. Upload an Image
Your Gamepass needs an icon. You can upload any image from your mobile gallery. Ensure the image is clear and represents what the buyer is getting. If you don't have an image, Roblox will provide a default one, but custom images generally perform better.
2. Name and Description
Give your Gamepass a catchy name. Instead of calling it "Pass 1," try something like "Super Speed Boots" or "VIP Access." In the description, clearly explain what the player receives upon purchase. This reduces confusion and prevents negative feedback.
3. Save the Pass
Once you have uploaded the image and filled in the details, click "Create Pass." Your Gamepass is now created, but it is not yet for sale.
Setting the Price and Putting It on Sale
The final step is to determine how much your Gamepass will cost. To