How To Make A Gamepass In Roblox Without Robux
Many new creators believe that you need a budget of Robux to start monetizing your experiences on Roblox. However, creating a gamepass is completely free. Whether you are looking to fund a larger project or simply want to offer special perks to your players, learning how to set up these digital items is a fundamental step in game development.
In this tutorial, I show you the exact steps to create, configure, and publish a gamepass using the Roblox Creator Hub. Follow this guide to start earning Robux from your visitors without spending a single cent of your own currency.
What is a Roblox Gamepass?
A gamepass is a special item that players can purchase to gain a permanent advantage, a special ability, or a unique cosmetic item within a specific game. Unlike developer products, which are consumable (like in-game currency), a gamepass is a one-time purchase that stays with the player's account for as long as they play that specific experience.
Step-by-Step Guide to Creating Your Gamepass
Creating a gamepass has changed slightly with the update to the Roblox Creator Dashboard. You no longer need to navigate through complex menus in the old website layout. Follow these streamlined steps:
- Access the Creator Hub: Navigate to the official Roblox website and click on the "Create" tab in the top navigation bar. This will redirect you to the Creator Dashboard.
- Select Your Experience: Every Roblox user has a default place associated with their account. Click on the experience you wish to add the gamepass to. If you haven't created a custom game yet, you can use your default "Place."
- Navigate to Associated Items: Once you have selected your game, look at the left-hand sidebar menu. Scroll down until you find the "Associated Items" section.
- Choose the Passes Tab: Within Associated Items, you will see several tabs. Click on "Passes." This is where all your current and future gamepasses are managed.
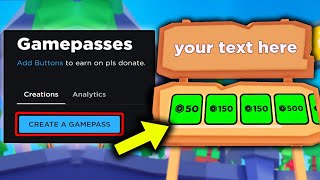
- Create a Pass: Click the blue "Create a Pass" button. You will be prompted to upload an image, give your pass a name, and provide a description.
Optimizing Your Gamepass for Sales
Since you are creating this without spending Robux, you need to rely on quality and marketing to attract buyers. To ensure your gamepass is successful, consider the following tips:
- Clear Imagery: Use a square image (512x512 pixels is recommended) that clearly represents what the player is buying. Avoid blurry or stretched images.
- Compelling Descriptions: Clearly state what the player receives. Instead of saying "Cool Sword," say "The Diamond Sword: Increases attack damage by 20% and grants a unique glow effect."
- Fair Pricing: Research similar games to see what the average price for a perk is. Starting with a lower price point can help you gain your first few sales and build trust.
Setting the Price and Earning Robux
After creating the pass, it will be "Off Sale" by default. To make it available for purchase, you must set a price:
- Click on the gamepass you just created from the Passes list.
- Select the "Sales" tab in the left-hand menu.
- Toggle the switch for "Item for Sale" to the "On" position.
- Enter the amount of Robux you want to charge.
- Note the Marketplace Fee: Roblox takes a 30% commission on all gamepass sales. This means you will receive 70% of the total price. For example, if you sell a pass for 100 Robux, you will earn 70 Robux.
- Click "Save Changes."