How to Get Better Reaction Time in Valorant – Proven Tips and a Winning Routine
Valorant’s fast‑paced gunfights reward players who can see an opponent, aim, and fire in the blink of an eye. While raw talent helps, most of the difference between a “good” and a “great” player comes down to reaction time. Below you’ll find a step‑by‑step guide that combines hardware tweaks, a proven aiming routine, and mental habits that together can shave precious milliseconds off your response.
1. Measure Where You Stand
Before you can improve, you need a baseline. Use a free online reaction‑time test (search “online reaction test”) or a dedicated tool like Human Benchmark. Record the average of three attempts and keep that number handy; you’ll be able to track progress after each training block.
2. Optimize Your Setup for Speed
Even the best reflexes can be hampered by a laggy setup. The following adjustments are widely recommended by competitive players and have measurable impact on input latency.
- Monitor refresh rate – Aim for at least 144 Hz; 240 Hz is ideal if your GPU can sustain it. Higher refresh rates reduce the time between frames, letting you see enemy movements sooner.
- Mouse sensor and polling rate – Choose a mouse with a reliable sensor (e.g., Pixart 3360) and set the polling rate to 1000 Hz. This ensures the cursor updates every millisecond.
- Graphics settings – Turn off motion blur, lower shadow quality, and set the resolution to native. The goal is a stable 200 FPS+ to keep input lag low.
- Windows power plan – Switch to “High performance” and disable “Game Mode” if it interferes with your frame rate.
3. Adopt a Structured Aiming Routine
In my own journey, the turning point was learning a perfect aiming routine that I now practice daily. The routine is short enough to fit into a warm‑up before every match, yet comprehensive enough to train both flicks and tracking.
- Warm‑up (2 minutes) – Use the Valorant practice range. Start with a 30‑second “spray‑control” drill on a stationary target to loosen the wrist.
- Flick drill (3 minutes) – Place three targets at 12, 3, and 9 o’clock positions. Snap to each target as quickly as possible, resetting your crosshair to the center after each hit. Focus on speed first, then accuracy.
- Tracking drill (2 minutes) – Enable the “Moving Target” mode. Follow a target that moves in a sinusoidal pattern across the screen, keeping your crosshair on it without overshooting.
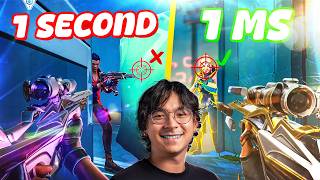
- Reaction drill (3 minutes) – Use a custom map or a third‑party tool that flashes a target at random intervals. React to the flash and click as fast as you can. This mimics the “Zowie Segment 04:31 React” clip where a sudden visual cue triggers a rapid response.
Repeat the entire sequence three times, then finish with a 30‑second “cool‑down” where you simply aim at static bots to reinforce muscle memory.
4. The Four Core Reasons Your Reaction Time Stalls
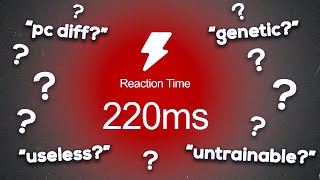
In a recent video I posted, I broke down four reasons why players often hit a ceiling with reaction speed. Understanding these blockers helps you target the right fixes.
- Inconsistent sleep patterns – Even a single night of poor sleep can increase average reaction time by 5‑10 ms.
- Excessive visual clutter – High‑contrast UI elements or background animations distract the brain, slowing visual processing.
- Improper grip and posture – A relaxed grip and neutral wrist angle reduce muscular fatigue, allowing faster micro‑movements.
- Lack of deliberate practice – Random play without focused drills leads to plateauing; structured routines are essential for continued gains.
Address each point: aim for 7‑8 hours of sleep, turn off unnecessary HUD elements, practice a light mouse grip, and stick to the aiming routine above.
5. Mental Techniques to Sharpen Reflexes
Reaction time isn’t just physical; it’s also cognitive. Incorporate these mental habits into your training schedule.
- Visualization – Before a match, close your eyes for 30 seconds and picture yourself spotting an enemy, snapping to head level, and firing. This primes neural pathways for faster execution.
- Controlled breathing – Deep, rhythmic breaths lower heart rate, which can improve focus during high‑intensity rounds.
- Micro‑breaks – After 45‑minute gaming blocks, stand up, stretch, and look at a distant object for 20 seconds. This reduces eye strain and keeps reaction latency low.
6. Use Community Resources for Ongoing Growth
Joining a community can keep you accountable and expose you to new drills. I host a Discord server (https://discord.gg/emXgySXuU8) where members share custom aim‑maps, reaction‑time benchmarks, and feedback on each other’s gameplay. Engaging with peers also provides motivation to keep the routine consistent.
7. Track Progress and Adjust
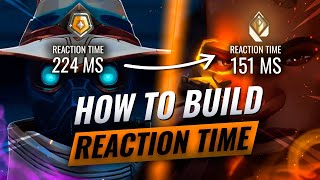
Every two weeks, retake the online reaction test and compare it to your baseline. If you see a 5‑10 ms improvement, you’re on the right track. If progress stalls, consider tweaking one variable at a time—perhaps a different mouse DPI or a longer warm‑up.
8. Bonus: Turn Practice Into Fun
One of the most effective ways to stay disciplined is to blend training with entertainment. In a recent sponsored video for PowerColor, I used a “go outside” challenge as an excuse to record a new aiming routine outdoors, proving that a change of scenery can refresh your mind and keep practice enjoyable. Feel free to record your own sessions, share them, and get feedback from the community.
Conclusion
Improving reaction time in Valorant is a blend of hardware optimization, a repeatable aiming routine, mental conditioning, and consistent tracking. By measuring your baseline, fine‑tuning your setup, following the six‑step routine outlined above, and addressing the four common blockers, you can reliably shave milliseconds off your response. Those milliseconds translate into more headshots, more round wins, and a higher rank.
Start today: set up your monitor, run the routine, and join the Discord community for support. With focused practice, your reaction time will improve, and you’ll notice the difference the next time you hear that “click” of a perfect headshot.
![How to get FASTER REACTION TIME! [VALORANT] *2022*](https://i.ytimg.com/vi/jI_RwaKGDx8/mqdefault.jpg)