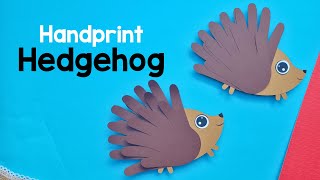
Hedgehog Craft Ideas: From Yarn to Paper and Beyond
Hedgehogs have become the beloved British garden visitor, and their charming spines inspire crafters of all ages. Whether you’ve spotted one in the wild or you simply adore their cute silhouette, a hedgehog craft project lets you bring this tiny animal into your home. Below you’ll find step‑by‑step guides for yarn hedgehogs, origami hedgehogs, and a few extra DIY twists that keep the spirit of the creature alive all year round.
Why Choose a Hedgehog Craft?
Creating a hedgehog craft offers several practical benefits:
- Eco‑friendly – Most projects use recycled yarn, scrap fabric, or paper you already have.
- Educational – Kids learn basic stitching, folding, and design principles while learning about wildlife.
- Decorative – A finished hedgehog adds a whimsical touch to shelves, garden pots, or holiday tables.
- Therapeutic – Repetitive motions of knitting or paper folding can reduce stress and improve focus.
Yarn Hedgehog: A Simple Knitted Companion
If you haven’t seen a hedgehog in the garden this year, making one from yarn is a quick way to welcome the creature indoors. The following instructions assume you have basic knitting or crochet skills.
Materials Needed
- Medium‑weight yarn in brown, beige, and a contrasting colour for the nose.
- Size G (4 mm) crochet hook or knitting needles.
- Fiberfill stuffing.
- Yarn needle for weaving in ends.
- Optional: small black beads for eyes.
Step‑by‑Step Instructions
- Body: Start with a magic ring, work 12 single crochets, then increase each round until the circle measures about 5 cm in diameter.
- Spines: Using a contrasting colour, crochet short rows of 4‑5 stitches, then pull the yarn tight to create a “spike” effect. Attach spikes around the body, leaving space for the head.
- Head: Make a smaller sphere using the same method as the body, then sew it onto the front of the main body.
- Finishing touches: Add a tiny nose with the contrasting yarn and sew on beads for eyes if desired. Stuff the hedgehog firmly before sealing the final opening.
Watch a short video tutorial for visual guidance; many craf