How to Get and Use Free Bulletin Board Letters for Your Classroom
Creating an engaging learning environment starts with visual stimulation. Whether you are a first-year teacher or a seasoned educator, the challenge of updating classroom displays can be daunting. Free bulletin board letters are an essential resource for anyone who wants to create stunning displays without spending a fortune on pre-cut store-bought kits.
From welcoming messages for the first day of school to thematic seasonal displays, high-quality lettering helps organize your space and captures students' attention. In this guide, we will explore the best ways to source, create, and display your letters to make your classroom pop.
Why Use Printable Bulletin Board Letters?
Many educators find that purchasing themed letter sets for every single unit is financially unsustainable. Printable letters offer several advantages:
- Customization: You can choose the exact fonts and colors that match your classroom theme.
- Cost-Efficiency: By utilizing free templates, you can allocate your budget toward other essential learning materials.
- Flexibility: If you make a typo or decide to change a word, you can simply print a new letter rather than buying a whole new pack.
DIY Methods for Creating Your Own Letters
Ever wondered how to create your own custom lettering that looks professional? You don't need expensive equipment to achieve a high-end look. If you are looking for an easy DIY for your classroom, there are several methods to try.
The Digital Printing Method
The fastest way to get free bulletin board letters is through digital templates. You can use word processing software or free design tools to type your message, select a bold font, and increase the size to fit the page. For those who want a more stylized look, searching for "free printable alphabet templates" often yields a variety of styles, from playful bubble letters to elegant scripts.
The Stencil and Trace Hack
If you don't have access to a printer, try this simple hack for creating your own: project your text onto the wall or board using a digital projector, then trace the letters directly onto your colored cardstock. This ensures that your spacing is perfect before you ever make a cut.
Adding Texture and Style
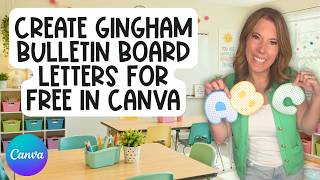
Want to create adorable gingham or patterned letters? Instead of printing colors, print your letters in black outline on white paper. Then, use patterned scrapbooking paper or fabric to create a backing. This adds a 3D effect and a touch of personality to your display.
Tips for Efficient Cutting and Mounting
Cutting out dozens of letters can be time-consuming. To quickly and efficiently create your set, consider these tips:
- Use a Paper Trimmer: Cut the paper into squares first to remove the bulk of the white space before using scissors for the detailed curves.
- Invest in a Die-Cut Machine: If your school has a communal workroom with a Cricut or a manual die-cut machine, use these to ensure perfectly uniform edges.
- Laminate for Longevity: To ensure your free bulletin board letters last the entire school year, laminate them before cutting. This allows you to reuse them in future semesters.
Creative Display Ideas for Educators
Once you have your letters ready, the way you arrange them can change the entire vibe of the room. Consider these layout ideas:
The Interactive Board
Instead of just a static title, use your letters to create a question. For example, "What are we learning this week?" and leave space below for students to add their own thoughts or goals.
The Seasonal Rotation
Keep a folder of "essential" letters (A, E, I, O, U, R, S, T) that you use frequently. By having a stock of these, you can quickly pivot from a "Winter Wonderland" theme to a "Spring Growth" theme without starting from scratch.