Cornell Notes for Geometry: A Practical Guide for Students, Teachers, and Parents
When it comes to mastering geometry, the way you organize information can be just as important as the concepts themselves. The Cornell Notes system—originally designed for lecture‑based subjects—works remarkably well for geometry because it forces you to break down definitions, theorems, and proofs into bite‑size, review‑ready pieces. This article explains how students use the Cornell method in geometry, provides a step‑by‑step tutorial on taking notes from a textbook, and shares real‑world results that illustrate why the technique is gaining popularity among teachers, parents, and learners of all ages.
Why Cornell Notes Fit Geometry Perfectly
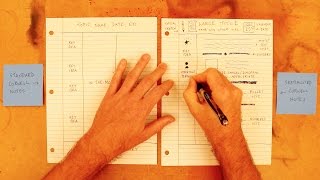
Geometry relies heavily on visual relationships, precise terminology, and logical reasoning. The three‑section layout of Cornell Notes—cue column, note‑taking area, and summary—mirrors the way geometry problems are solved:
- Cue column: List key terms (e.g., “parallel lines,” “midpoint theorem”), symbols, and question prompts that trigger recall.
- Note‑taking area: Record definitions, step‑by‑step proofs, diagram sketches, and example problems.
- Summary: Write a concise explanation of the concept in your own words, reinforcing understanding.
By separating cues from detailed notes, you create a built‑in study tool that turns a single set of pages into a dynamic review sheet.
A Brief Description of the Cornell Layout
The classic Cornell page is divided as follows:
- Draw a vertical line 2.5 inches from the left edge—this creates the cue column.
- Leave the remaining 6 inches on the right for the note‑taking area.
- Reserve the bottom 2 inches for the summary after the lesson.
For geometry, you may want to add a small margin on the right side of the note‑taking area for quick diagram sketches. This extra space keeps visual information close to the corresponding text.
How to Take Cornell Notes From a Geometry Textbook
Step 1 – Preview the Section
Before you open the book, skim the heading, bolded terms, and any highlighted theorems. Write these items in the cue column as preview cues. This primes your brain for the material you are about to encounter.
Step 2 – Record Core Information
As you read,