Mastering Clipart Lettering: A Guide to Creating and Using Vector Typography
Clipart lettering refers to pre-designed alphabets, words, or phrases created as graphic elements. Unlike standard system fonts, clipart lettering often incorporates artistic textures, 3D effects, and custom illustrations that make text feel like a piece of art. Whether you are designing for a brand, creating cut files for a Cricut machine, or developing digital assets for sale, understanding the nuances of lettering graphics is essential.
The Difference Between Fonts and Clipart Lettering
While both involve text, fonts and clipart lettering serve different purposes. A font is a set of characters that a computer renders automatically as you type. Clipart lettering, however, consists of vector graphics (often in SVG or EPS format). Each letter is a shaped object that can be manipulated individually.
This distinction is crucial for designers. Because clipart lettering is vector-based, it can be scaled to any size without losing quality. This makes it the preferred choice for large-scale prints, logos, and physical crafts like vinyl cutting.
Popular Styles of Clipart Lettering
Depending on the project, different styles of lettering evoke different emotions and aesthetics:
- Brush Lettering: Mimics the look of a handheld brush pen. It is characterized by thick downstrokes and thin upstrokes, making it ideal for elegant logos and wedding invitations.
- Neon Styles: Designed to look like glowing gas tubes. These are highly popular for social media graphics and modern signage.
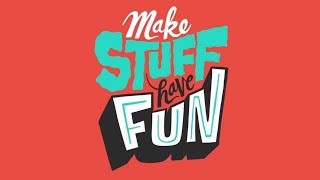
- 3D and Block Lettering: These styles add depth and dimension. Beginners often start with 3D drawings on paper using markers before transitioning these styles into digital vectors.
- Hand-Drawn Vectors: These provide an organic, human touch that standard fonts cannot replicate, often used in "boho" or rustic branding.
How to Design Sellable Lettering SVGs
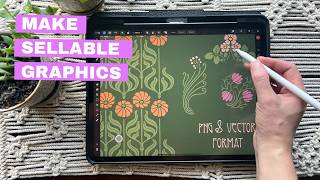
Creating clipart lettering for marketplaces like Etsy or Creative Market requires a focus on usability and technical precision. If you are curious about how to design sellable SVGs, follow these core principles:
1. Perfecting the Curves
In software like Adobe Illustrator, the "Pen Tool" and "Curvature Tool" are vital. To achieve a professional look, you must minimize the number of anchor points. Too many points create "bumpy" lines; fewer points create smooth, sweeping curves that look polished and professional.
2. Ensuring Cut-Readiness
For users of Cricut or Silhouette machines, a "cut file" must be clean. This means there should be no overlapping paths or stray points. Designers must "expand" their strokes and "unite" overlapping shapes into a single compound path to ensure the cutting blade follows a clean line.
3. Choosing the Right Palette
While many clipart letters are sold in black, providing a variety of color palettes or a "gold foil" effect can increase the value of the graphic pack. Consistency in line weight across the entire alphabet is key to maintaining a cohesive look.
Tools for Creating Clipart Lettering
Depending on your skill level, different tools offer different advantages:
- Adobe Illustrator: The industry standard for vector graphics, offering total control over bezier curves and typography.
- Procreate: Excellent for hand-drawn lettering. Artists often draw their letters here and then import them into vector software for "tracing" into SVGs.
- Inkscape: A powerful, free, open-source alternative for those who need vector capabilities without a monthly subscription.
- Canva: Useful for arranging pre-made clipart lettering into final designs for social media.
Tips for Beginners
If you are just starting with lettering art, begin with a physical medium. Practicing 3D styles with markers on paper helps you understand how light and shadow work. Once you master the visual logic of a letter's form, transitioning to digital tools