Mastering Biology with an Animal Cell Worksheet Coloring Guide
Hi friends, learning the complexities of biology doesn't have to be limited to reading heavy textbooks. One of the most effective ways to memorize the structure and function of biological units is through visual learning. Using an animal cell worksheet coloring activity allows students to engage with the material actively, turning a complex scientific diagram into a creative project.
Whether you are a student trying to ace a science quiz or a teacher looking for a classroom activity, combining art with science helps solidify the spatial relationship between different organelles. Let's explore how to use coloring worksheets to master the animal cell.
Why Use Coloring Worksheets for Science?
Coloring is not just for young children; it is a powerful mnemonic device. When you assign a specific color to a specific organelle, your brain creates a visual association that is easier to recall during an exam than a written definition. This method of active learning transforms passive observation into a hands-on experience.
By using an animal cell coloring page, learners can:
- Differentiate Organelles: Distinguish between the smooth and rough endoplasmic reticulum.
- Understand Spatial Layout: See how the nucleus sits centrally while the cell membrane defines the boundary.
- Improve Focus: The meditative nature of coloring helps students concentrate on the details of the cell structure.
Step-by-Step: How to Draw and Color an Animal Cell
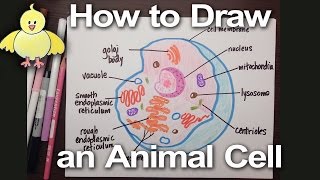
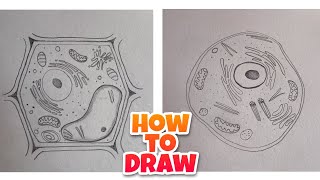
If you don't have a pre-printed worksheet, you can create your own. Learn how to draw an animal cell by following these simple steps. Let's draw an animal cell together to understand its anatomy from the ground up.
1. The Cell BoundaryStart by drawing an irregular, rounded circle. Unlike plant cells, which have a rigid rectangular shape due to the cell wall, animal cells are flexible. This outer line represents the cell membrane, which controls what enters and exits the cell.
2. The Command CenterInside the cell, draw a smaller circle, usually slightly off-center. This is the nucleus. Inside the nucleus, add a dense, dark spot called the nucleolus. When coloring, use a bold color like purple or dark blue to signify the importance of the nucleus as the control center.
3. The Energy ProducersDraw several small, oval shapes with a zigzag line inside them. These are the mitochondria, often called the powerhouses of the cell. A bright color, such as red or orange, is ideal here to represent energy production.
4. The Transport SystemAround the nucleus, draw a series of folded membranes. The part with small dots is the rough endoplasmic reticulum (ER), and the smooth part is the smooth ER. Use two different shades of the same color (like light blue and dark blue) to show they are related but different.
5. The Packaging PlantAdd a few flattened sacs that look like a stack of pancakes. These are the Golgi apparatus. These organelles package proteins for transport. A contrasting color like green or yellow works well here.
6. The Final DetailsFinally, scatter small circles throughout the cytoplasm. Some should be small dots (ribosomes) and some slightly larger circles (lysosomes or vacuoles). Fill the remaining empty space with a light shade of yellow or pale blue to represent the cytoplasm.
Tips for an Effective Study Session
To get the most out of your animal cell worksheet coloring experience, try these strategies:
- Create a Color Key: On the side of your paper, create a legend. For example: Blue = Nucleus, Red = Mitochondria. This forces you to identify the organelle before you apply the color.
- Label as You Go: Don'