Mastering Geometry with an Angle Bisector Worksheet
In the study of geometry, understanding how to divide an angle into two equal parts is a fundamental skill. Whether you are a student preparing for a standardized test or a teacher developing a curriculum, using a structured angle bisector worksheet is one of the most effective ways to move from theoretical knowledge to practical application.
What is an Angle Bisector?
An angle bisector is a ray, line, or segment that divides an angle into two congruent (equal) smaller angles. For example, if you have a 60-degree angle, the angle bisector will split it into two 30-degree angles. This concept is essential for solving complex problems involving triangles, symmetry, and coordinate geometry.
In a triangle, the intersection of the three internal angle bisectors is known as the incenter. The incenter is the center of the circle that can be inscribed within the triangle, touching all three sides. Understanding this relationship is a core component of high school geometry.
How to Construct an Angle Bisector
While a protractor can be used to measure and divide an angle, the classic geometric method involves using a compass and a straightedge. Learning how to construct an angle bisector manually helps students understand the logic of equidistant points.
- Draw an Arc: Place the compass point on the vertex of the angle and draw an arc that intersects both sides of the angle.
- Create Intersection Points: Without changing the compass width (or adjusting it slightly), place the point on one of the intersections created in step one and draw a small arc in the interior of the angle.
- Repeat for the Other Side: Place the compass point on the second intersection and draw another arc that crosses the one made in step two.
- Connect the Vertex: Use a straightedge to draw a line from the vertex through the point where the two interior arcs intersect.
Using Digital Tools for Learning
Modern geometry education often blends traditional paper-and-pencil methods with digital software. To supplement a physical angle bisector worksheet, many educators recommend using tools like GeoGebra. Using GeoGebra to construct an angle bisector allows students to manipulate the angle in real-time and observe that the bisector remains accurate regardless of the angle's size.
Additionally, geometry video tutorials are invaluable for visual learners. These tutorials often walk students through the precise movements of the compass, reducing the frustration that can occur when following written instructions alone.
Key Components of an Effective Angle Bisector Worksheet
A high-quality worksheet should guide the student through a progression of difficulty. To maximize learning, look for worksheets that include the following sections:
- Identification: Exercises where students must identify the bisector in a given diagram.
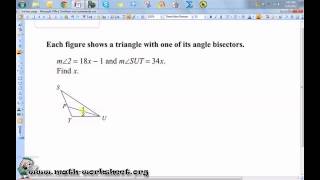
- Calculation: Problems that require students to use algebra to find the value of an unknown angle, given that the line is a bisector.
- Hands-on Construction: Blank angles where students must use their compass and straightedge to draw the bisector.
- Proof-Based Questions: Advanced sections that ask students to prove why two angles are congruent using the Side-Angle-Side (SAS) theorem.
Common Mistakes to Avoid
When working through an angle bisector worksheet, students often encounter a few common pitfalls. Recognizing these early can accelerate the learning process:
Incorrect Compass Placement: A common error is changing the compass width between drawing the two interior arcs. For the bisector to be accurate, the distance from each intersection point to the center arc must be identical.
Confusing Bisectors with Perpendiculars: Students sometimes confuse an angle bisector with a perpendicular bisector. Remember: an angle bisector divides an angle into two equal parts, whereas a perpendicular bisector divides a line segment into two equal parts at a 90-degree angle.